
How to Manage Your UI Design Inspirations with Eagle App
In a nutshell
In this guide, you will discover the Eagle app and how to use it to manage your UI Design inspirations, with the help of a full tutorial and a ready-to-use Eaglepack of the folder structure I use.
Table of contents
What is Eagle?

When you’re a UX/UI Designer, you often have a lot of images of designs that you like, and you may tend to just save them in folders on your machine or for example, on Pinterest boards. That said, this isn’t really convenient, as finding them can get complicated as you accumulate more of them.
That’s where Eagle comes in, which is an application for Mac and Windows that lets you save and organize all your inspirational images. It goes even further by allowing you to organize any type of file such as videos, audio or even fonts and 3D files. Personally, I use it mostly to organize my inspirations and find them whenever necessary.
I discovered it a few years ago, almost at the time of their first release (they recently celebrated their 5th anniversary in April 2022 🎂). Since then, Eagle is often open every day on my Mac, it is one of the tools I use the most with Notion and Figma.
The application goes hand in hand with their browser plugin (Chrome, Safari, Firefox, and Edge) which allows you to easily save images from a site and bookmarks of your favorites ones.
Why use it?

When doing UX/UI Design, or in fact any creative activity, building on other work is always a good practice. I talk more about creativity and the importance of inspiration in it with this article.
With Eagle, you will be able to save easily all the images, videos and sites you like and be able to find them easily the day of a project, it saves you time and you do not have to rely only on your memory.
How would we do without Eagle?
Eagle is not the only way to save your inspirations, you have several at your disposal, like Pinterest boards or collections on Dribbble and Behance, but for me, Eagle remains the best way because your inspirations are centralized in one place, and not on several services. To go further, I present you the advantages and disadvantages of the different methods in this article.
How much does it cost?
Yes Eagle is not free but for only 30$ and with the time we save, it’s worth it, and it’s a one-time payment with all future updates at no extra cost. Moreover, you can use your license on 2 machines simultaneously.
Recently launched: Eagle Community
Recently, with Eagle 3.0, they released many improvements, one of the most important being Eagle community. Accessible online or directly from Eagle, you will be able to discover and directly add packs of illustrations, links and other assets in your Eagle library, for example this free 3D icon pack.
There is also a section about tools classified by categories.
Let’s talk about the limitations
So yes Eagle is the best, but for you to have a complete overview before using it, I still have to tell you about the main limitations. But honestly, they are really minor compared to the benefits.
Only for Mac and Windows
One of the main limitations is that it works only on these systems, so no tablets or smartphones.
No cloud solution specific to Eagle
Not really a problem for me but it’s up to you to set up a cloud usage. Even if you can use Eagle locally, it’s advised not to lose your files if your hard drive crashes and if you want to use Eagle on another of your machines. That is to say that Eagle saves all your files in a folder (called “library”), and it is this folder that you will have to put in your cloud solution (Google Drive, Dropbox, iCloud etc.).
That said, as they explain it here, it’s a choice on their part that is justified by the fact that, developing a cloud solution of their own would be very time consuming and could cause problems for users. And above all, it would make them more expensive or even force them to set up a subscription system, so personally, I prefer that they have made this choice.
Library sharing
Another point to mention, is about sharing an Eagle library between several designers, there can be conflicts when several people modify a library at the same time. That’s why it is better adapted to a solo use.
A library architecture specific to Eagle
And finally, keep in mind that the library folders created by Eagle are only readable by it. So if the company shuts down and the software doesn’t work anymore, it could be problematic. However, even in this case, there is a good chance that they will make the tool free, or even open source, and it will continue to work.
Also, when you import a file into Eagle, for example a font, it is then duplicated in the Eagle library, even if the file is already in a folder of yours on your machine. This is not really a problem because it allows Eagle to be more optimized, more info here.
How I use Eagle for UI Design

Now that we’ve done the introductions and you’re more familiar with Eagle, here’s a tutorial on how I set it up and use it on a daily basis in the specific context of UI Design. Note that with time, after having tested several ways of doing things, I think I have reached the most optimal one.
In summary, the 6 steps are:
- 1. Setting up
- 2. Save inspirations
- 3. Take a moment to sort
- 4. Find inspirations
- 5. Visualize the inspirations
- 6. Grouping inspirations by project
Be careful, this is of course an adapted use for me, but Eagle is powerful and offers a lot of flexibility in its use, that is to say that there are several ways to achieve the same result, so it’s up to you according to your needs and preferences.
Ready-to-use folder structure
Before starting, I uploaded on Eagle Community a pack with all my folders (without the inspirations) to make it easier for you instead of starting from scratch:

It’s a .eaglepack file and by opening it (as long as you have installed Eagle and created a library first), you will have a new “UI” folder in Eagle with all my folder structure. We’ll talk more about its structure below in the “Creating folders” section.
1. Setting up
Installation
Download the version for your system from their homepage. You can install and use it free for 30 days.
First library
Once installed, Eagle will invite you to create your first library. In my case, it was “inspirations”, it’s the one I use the most and as its name indicates, where I keep all my inspirations. I also use another one “resources” which we will talk about later.
Then, you will have to indicate where to save it, in my case I put it in the cloud because I use Eagle on two machines (work and home). Note that you can first put it locally and later, if you change your mind for the cloud, move it there. Eagle will then ask you to tell it the new location of the library.
Settings
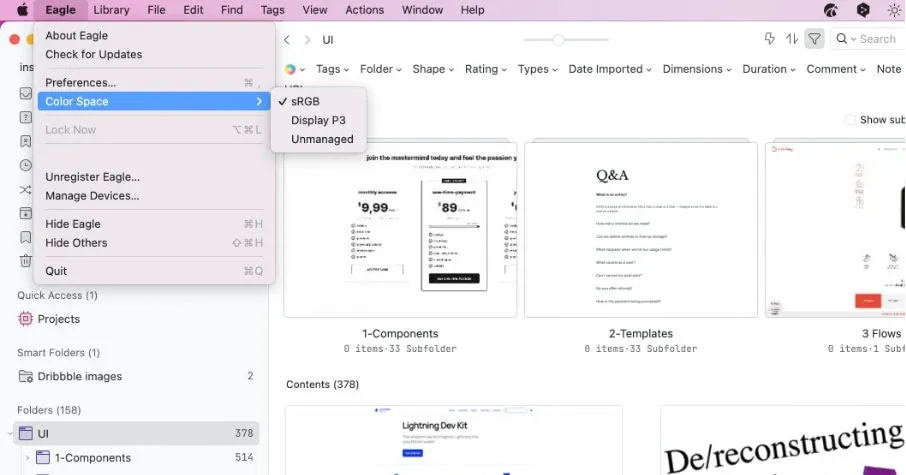
Before taking a look at Eagle’s settings, I advise you to switch the color space to sRGB (or P3 if you prefer and your screen supports it):
Then, you can change the configuration according to your needs in the preferences (Eagle > Preferences). Personally, I just set the theme to auto in “General”, the mouse scrolling behavior to “Vertical Scroll” in “Viewer” and left the rest on the default choices.
Installation of the browser plugin
Once Eagle is installed and configured, you have to install the plugin for your browser.
It allows you to save images in particular and a part or a whole site as well as simply its URL.
Creating folders
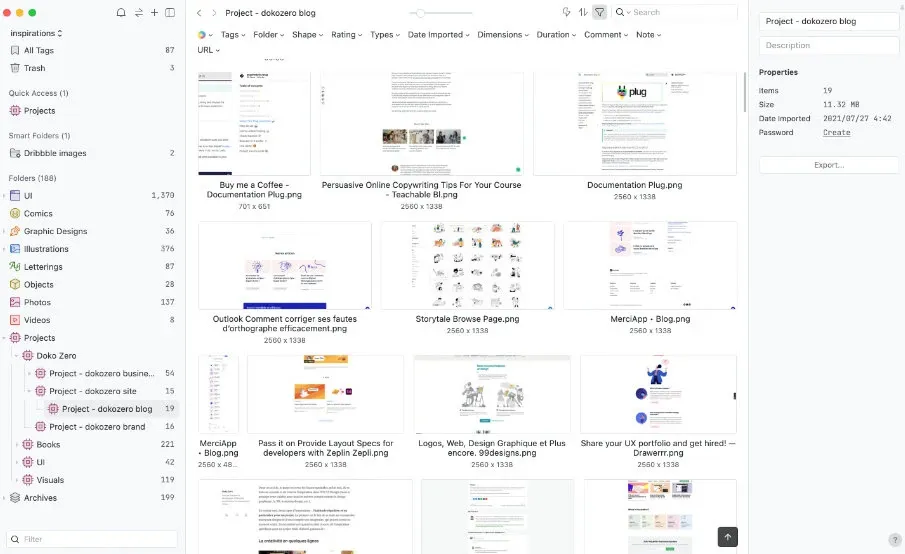
In my process, folders are collections organized by themes. Here’s an overview of what it looks like:
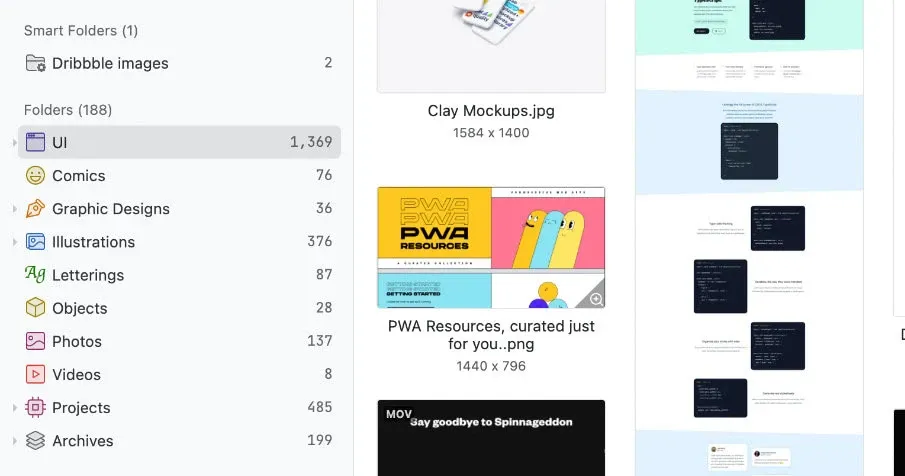
You may notice that I don’t only have UI Design inspirations, I think it’s important to find inspiration in other areas as well, although the “UI” folder is the one with the most. I could have made two libraries, to have separate UI inspirations, but I prefer to keep everything at hand.
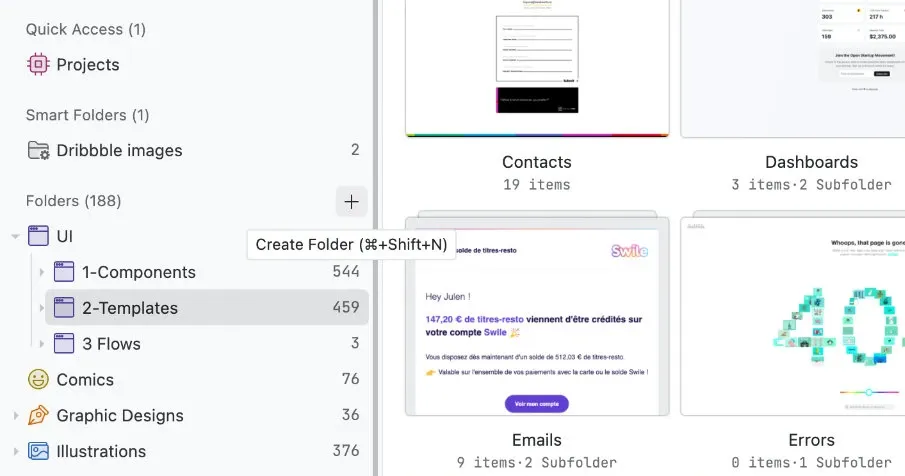
To create a folder, go here:
You can also see that I have assigned colors and icons to each collection to better distinguish them. For this, a simple right click will give you access to the parameters (you can select several sub-folders at the same time)
So, I have several collections but let’s focus on the structure of the “UI” folder, as it is the one I use the most.
Inside this one, I created 3 main folders that follow a logical UI Design order (each part consists of elements from the previous one):
- Components > Templates > Flows
If you don’t have it yet, I advise you to download my pack with all my UI folders so you don’t have to create all of them manually.
Let’s look at the content of each of them:
1-Components
Here, I gather all the basic elements of interfaces, so we find inspirations of buttons, banners, modals, forms, footers, etc.
2-Templates
Templates are pages or screens common to several sites or apps, for example a 404 page, blog post, pricing page, stats page, etc.
3-Flows
This is a folder I added recently, the flows are concrete actions like “add to cart” or “create an account”. They are therefore based on templates, for example, the action “add to cart” is composed of a template “product page” and “cart page”, or even a modal after the addition to confirm the action. This folder is composed, naturally, of video captures.
An inspiration can have several folders
If for example an illustration is on a login screen, and I like it as much as the screen itself, I can then in this case, assign two folders to this image, “Illustration” and “UI > 2-Templates > Logins”, that’s the strength of Eagle: its flexibility. Thus, an image can be in as many folders as you want, and because of the way Eagle manages libraries, it will not be duplicated.
Note: the naming of folders can be “confusing” in one way, with an inspiration selected in the right panel, they are called “category” but it is just semantics.
Creating tags
So, folders are collections but Eagle offers the possibility to assign tags to our inspirations. In my case, I use them as attributes.
Note that if you downloaded the pack mentioned in the previous point, I could not put the tags grouped by folder in it, so it will be up to you to create them.
To create new tags, it’s by selecting an inspiration then from the right panel (or by pressing “T”). From there, you can start typing the name of your tags, Eagle will create them if they do not exist. You can then find them in the “All Tags” tab (shortcut ⌘+6 or Ctrl + 6):
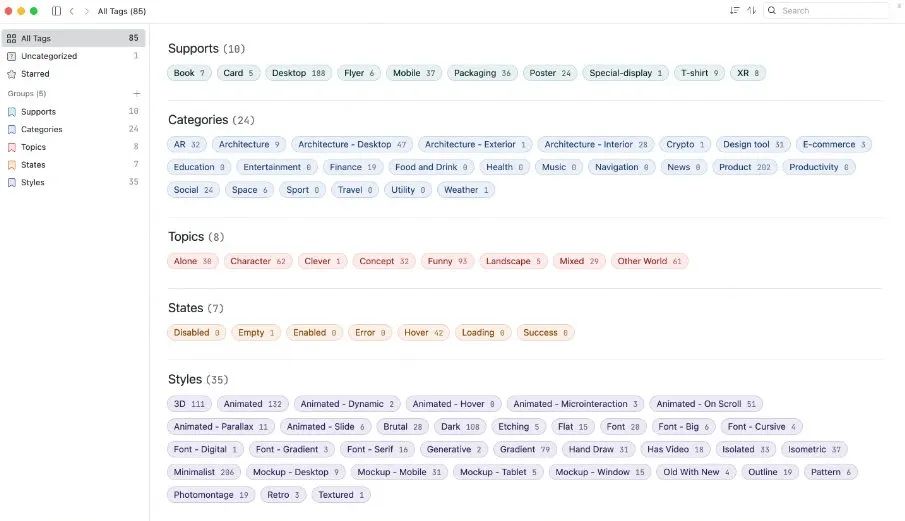
You can see that I have grouped them into 5 parts with a color for each, we will see afterwards, when we find inspirations, why this is useful.
Let’s see the role of each group:
Supports
As the name suggests, to indicate a support. For example an illustration can be on a book, a flyer, a business card, or a UI inspiration on a mobile, desktop or tablet screen.
Categories
Here I have tags for domains, for example a header for a website in the “E-commerce” category would have this tag.
Topics
Sometimes I like to assign a topic to an inspiration, for example a funny illustration with “Funny” or inspirations with characters using “Character”.
States
This is a group I recently created, I use them to describe a state of a component or a template, for example, it could be useful if I have a dashboard inspiration but it’s empty because the account has just been created, to assign it the “Empty” tag or the same dashboard with elements but loading with the “Loading” tag.
Styles
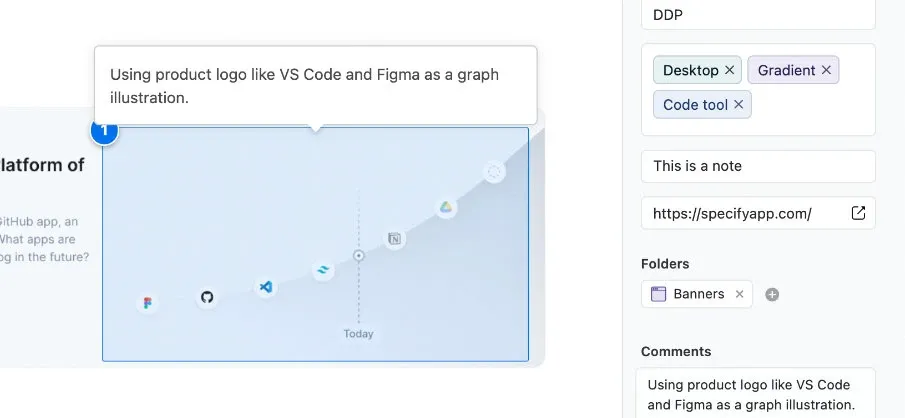
In this group, there are visual aspects that I give to inspirations such as “3D”, “Minimalist”, “Retro”, etc. For example, a banner with a nice gradient and a 3D illustration on it would have “3D” and “Gradient” tags.
Folders or tags?
The question can be raised because both can be used in almost the same way. I’ve tested several methods, for example at one time I was using only folders but with time I’ve come to use both, especially when I’m searching through my inspiration base, we’ll see that in point 4.
2. Save inspirations
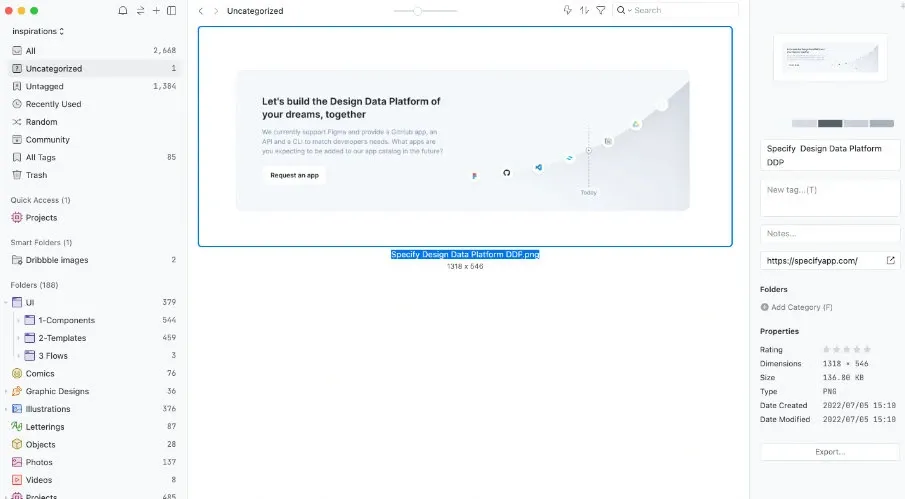
Let’s go for example on Dribbble, with the plugin, you have several ways to save an image, my favorite is to simply right click while holding the ⌥ (Alt) key on the image in question. You will then find it in Eagle on “Uncategorized”.
Then, let’s say you like a component of a site, for example this banner:
To make an image only of this part, I use the “Capture Area” function of the plugin with ⌥+2 (Alt + 2) and Eagle even adds to the capture the URL of the site automatically:
Tip: with the “Capture Area” mode, you can hold ⌘ (Ctrl) and hovering over components, Eagle will be smart enough to preselect them. More info.
Note that you can also save captures outside your browser, in fact, when Eagle is open, you have an icon of it in the macOS menu bar at the top right with the capture options (shortcut ⌥+⌘+E or Alt + Ctrl + E to capture a part of your screen). But beware, unlike the browser plugin, you won’t get the URL of the site.
And finally, to simply save a link to a site, like a bookmark manager, I use “Save URL to Eagle” or ⌥+0 (Alt + 0). Note that in this case, you will even be able to browse the saved site from Eagle which integrates a browser.
These are the 3 saving functions I use the most but you can discover others on this page, notably the drag and drop which allows you to put your inspirations directly in a folder without going through the “Uncategorized” box.
Tip: capture a video recording
Let’s say you like an animated effect on a site, how to capture it in motion in Eagle? The plugin does not allow (yet?) to do that. But fortunately, macOS and Windows each have a native application to capture a video of your screen, here is how I use it on Mac:
Let’s say I like the effect on the header of this site and I want to capture it for later:
↳ Header of Meteor (source)
I will then do ⌘+⇧+5 and define a recording area then capture the site for a moment.
Then I’ll put the generated video in Eagle without forgetting to copy and paste the site’s URL in the imported video info on the right panel (it’s always better if you want to check the effect at the source or just find the original site).
3. Take a moment to sort
Often, my use of Eagle is in two stages:
- Save inspirations in the “Uncategorized” tab without sorting them.
- Take a moment once a week to look at the captured inspirations in order to tag them and put them in one, or several folders.
By doing this, I avoid interrupting what I’m working on, as I often come across inspirations while I’m immersed in a design project, so I set aside a moment in the week to sort through all the images I’ve saved. By doing so, I can better “digest” the inspirations, the first time I see them, and then a second time when I observe them in more detail to categorize them.
Let’s take an example of an image to sort:
Assign tags
First I go to the “Uncategorized” tab (shortcut ⌘+2 or Ctrl + 2), take a inspiration and then, before sending it to a folder, I will assign one or more tags to it (with the “T” shortcut).
Note that you can also assign tags to multiple inspirations at the same time if you select them together first.
Send to one or more folders
Once the tags are added, it’s time to send the image to one or more folders. To do this, I press ⌘+⇧+J (Ctrl + Shift + J) to select the folder(s) the image will go to (I move with the arrows and press enter rather than use the mouse) and then I press ⌘+⏎ (Ctrl + Enter) to send.
Like tags, you can assign folders to multiple inspirations at the same time.
Use ratings, notes and comments
These aren’t features I use often, but they can be handy for adding extra levels of classification.
Ratings and notes
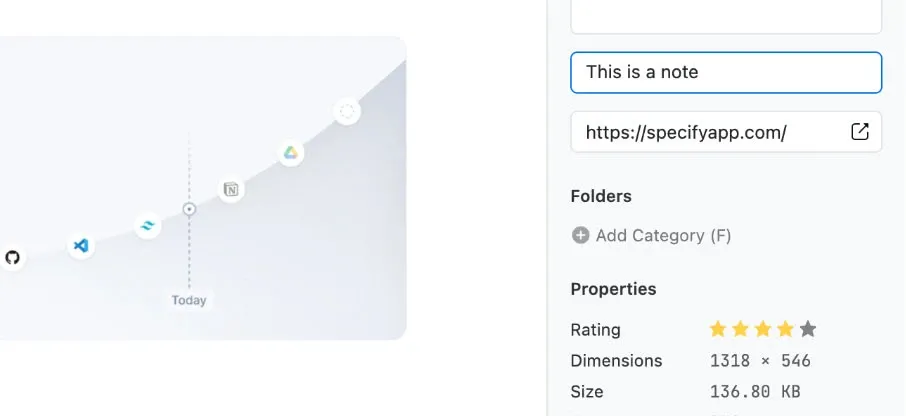
You can give a 0 to 5 stars rating to your inspirations as well as a note. For the rating, at first sight we can say to ourselves why do it on inspirations that we keep? Indeed, if you have saved them it is because you like them and therefore they all have 5 stars! Of course, but there is a case for me where they are useful, in the case where I would evaluate not the quality of an inspiration but its difficulty, like 5 stars = technically difficult.
For example, if I design a header for a website and search among my inspirations, I may not want to display headers that are too technically complicated because I know I won’t have the time to come with something similar.
Comments
I rarely use it, but you can comment in more detail about your inspirations. It will be useful afterwards, when you search for them, because Eagle allows you to filter according to the comments (as well as the ratings and the notes by the way). To do this, once your inspiration is open on Eagle, you can switch to comment mode with the “C” key.
4. Find inspirations
Now that our inspirations are tagged and stored in folders, this is where the magic of Eagle comes into play 🤩. Even if it may seem a bit long and tedious, everything we did before will allow us, with Eagle’s search tools, to easily and quickly display what we are looking for in our database, and believe me, it’s really handy when we are working on a project and we are quickly looking for inspirations for it. There are several approaches, here are my favorites:
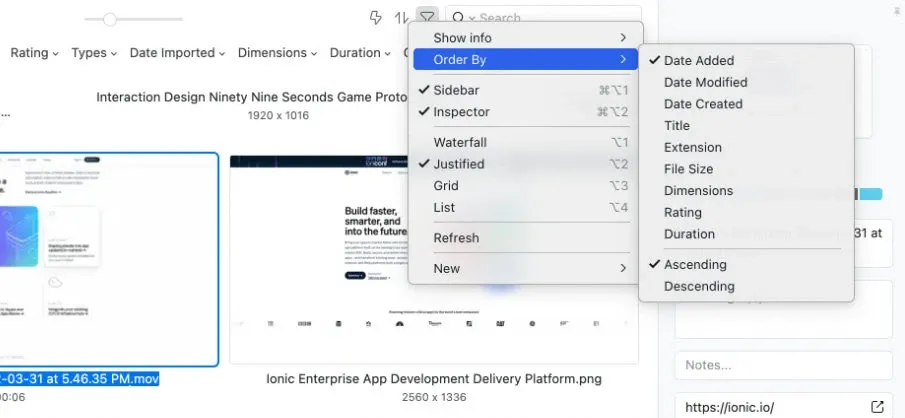
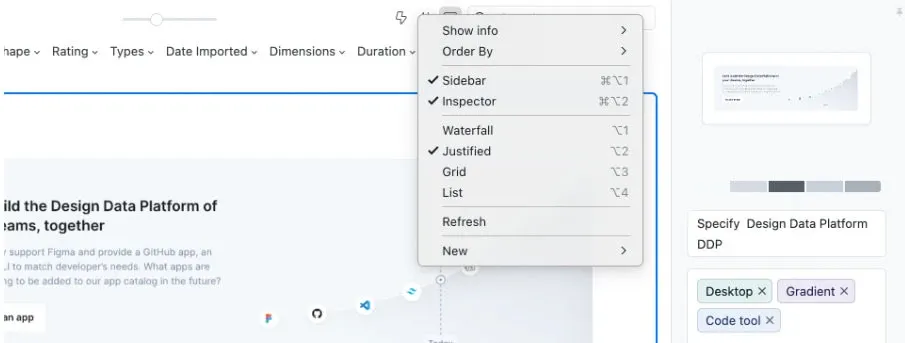
From the “All” tab
As its name suggests, here Eagle shows you all your inspirations, sorted by order of addition. You can also change the ranking parameter here:
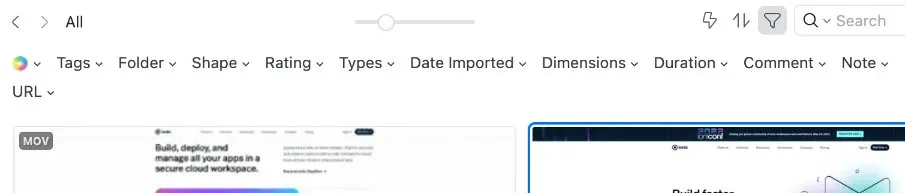
So, from this screen, if you don’t have the filter bar displayed, do ⌘+⇧+F (Ctrl + Shift + F) and you should have this:
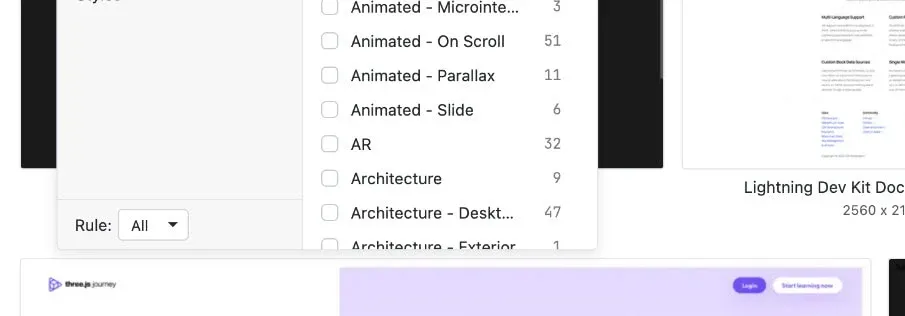
With it, you can for example tell Eagle to display only inspirations in 3D style (shortcut ⌥+T or Alt + T to open tags), or even adding the filter “Types: gif, video” to see only 3D inspirations in motion, and we could further filter to display only those coming from the Dribbble site for example:

This is where having grouped tags helps, because they are used in this bar too. Another example, I could display all the inspirations on desktop with the “Desktop” tag, in the category “Finance” with the style “Dark”.
Be careful to choose the “All” mode to display only the inspirations that have all the tags and not one or more:
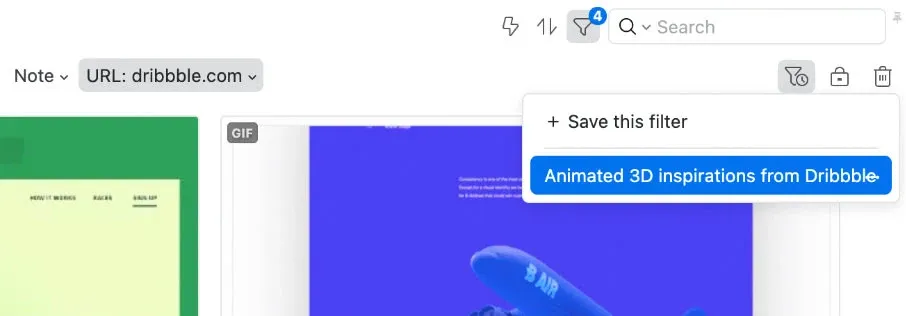
Tip: you can save the filters you use often, for this, once your filters are set, you have the option to save them to be able to put them back with a click:
There is also a search function at the top right, in this case Eagle will search for occurrences of this text in the titles, notes, comments, tags, URLs, etc. of the inspirations.
From a specific folder
This is the way I use the most. Of course, you can do the same thing from the “All” tab since you can also filter by folder, but it’s more direct this way. For that, I often use the shortcut ⌘+J (Ctrl + J) which is similar to Spotlight on macOS (and which allows, among other things, to navigate in the tags by pressing Tab). Once in a folder, for example “UI > 1-Components > Headers”, I still have the filter bar at the top, except that in this case, for example for tags, Eagle shows me only the ones present in this folder.
You can also go to a “high level” folder for example, I can go to the “UI” folder and apply filters. However, be careful to check the box “Show subfolder contents” at the top right.
Note that once a folder is selected in the left pane, you can navigate through it with the up down and left right arrows to close and open a folder respectively. You can also use the “/” shortcut to quickly expand/close everything.
5. Visualize the inspirations
Once the desired inspirations are displayed, you have several visualization options. You have for example four display modes:
Once you have chosen an option, you can zoom in or out with the - and + keys on your keyboard.
You can also press the Tab key to hide the sidebars. Then, to get a larger view of an inspiration, you have three options: open it with a double-click, hold down Z on the hover, or on the Mac, press the space bar.
You can also, but I rarely use it, open the file with the default application with ⇧+⏎ or by right-clicking, you have more application choices with “Open With”.
If you saved an inspiration from the web with the plugin, then Eagle automatically saved its source URL, you can open it in your browser with the shortcut ⌘+⇧+O (Ctrl + Shift + O).
6. Grouping inspirations by project
Last point of this tutorial, here is my approach to make collections of inspirations grouped by project.
I have a folder dedicated to this called simply “Projects” and inside it, I will create a new folder for each project I start. Then, during the previous step of looking for inspirations, if I like an inspiration and I want to be inspired by it for my current project, I will send it to the folder of this one (Eagle leaves it in its original folder) still with ⌘+⇧+J (Ctrl + Shift + J).
Example with my blog design inspirations:
I also added this folder in the “Quick Access” to have it always at the top in the left bar, for this, it’s by right clicking on the folder you want to pin.
To go further

So, we have seen the features I mainly use, but Eagle has many other powerful ones that can really level up your inspiration game 🚀, let’s go through them:
Using other libraries
You are not limited to one library, you can create several. To do so, you can do ⌘+L (Ctrl + L) to display the library management tool.
Personally, I use another one for resources. I won’t present it in more detail here because its structure is almost identical to the one of my free book on the best UX/UI Design resources. That said, unlike the inspiration library, I don’t use tags because it’s more of a bookmark manager than an inspiration manager, so the folders alone are enough.
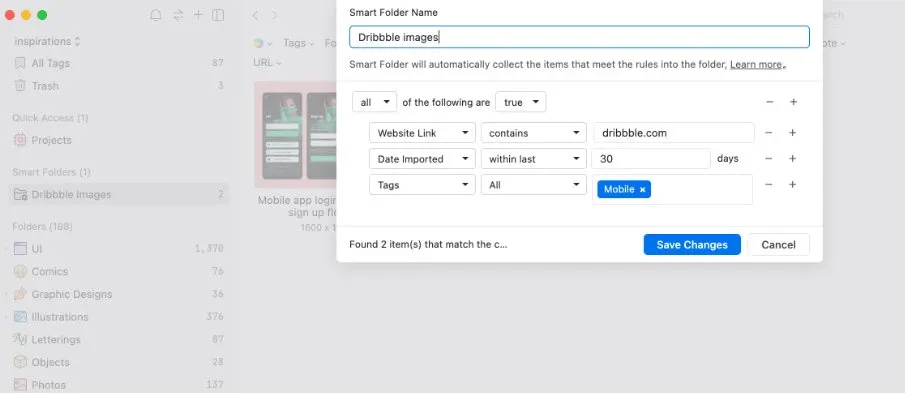
Smart folders
These are special and dynamic folders that don’t contain files but display some according to filters. I don’t use them much, but maybe in your case they will be useful.
For example, we could imagine a smart folder that would display all the inspirations coming from Dribbble, or to go further, display only those added in the last 30 days and that are mobile design. To do this, in the left panel, create a new smart folder with the following filters:
Eagle as an asset manager
Beyond inspirations, Eagle can manage a large number of file types, among others, SVG, fonts or even audio files.
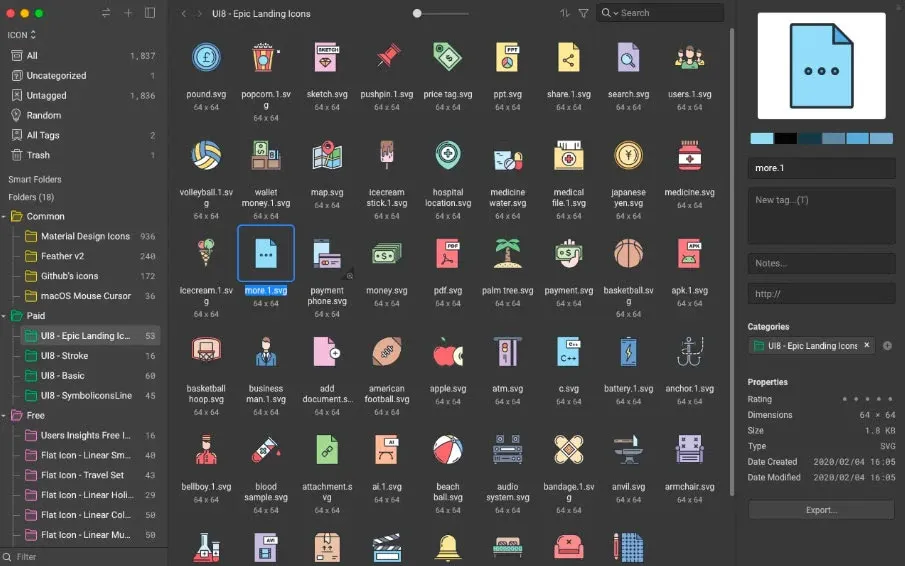
Icons
Icons are widely used assets in UI Design and Eagle can help you manage them. It’s not a feature that I personally use because I prefer to use plugins like Icons8 or Material Symbols and a Figma library for custom icons, but maybe in your case Eagle will suit you better, especially with Eagle community where you can find free icon packs and directly integrate them in your Eagle library, after that, you can copy and paste them from Eagle into your design tool.
Images and videos
In addition to icons, you can of course also manage photo assets, illustrations and videos that you often use in your designs.
Fonts
Eagle goes further with this type of file because not only you can put them in Eagle, but you can also activate them directly from it. That is, if a font is not activated, it is as if it was not installed on your machine. I don’t use it because I use few of them, but it can be useful if, for example, you have hundreds of fonts but you only use them for certain targeted projects or you simply prefer to search for them with Eagle rather than with your system’s tool like Font Book on macOS. More info here.
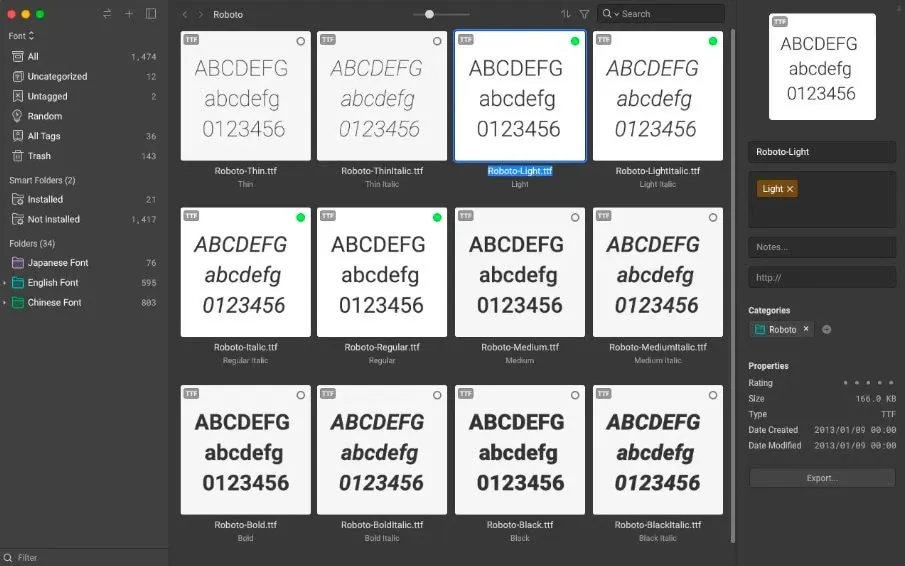
Note that by default, Eagle doesn’t propose the “Font” filter in the filter bar, to activate it, go to the settings.
Other tips
I list here some features that could be useful in some cases.
Filter by color
You can indicate a color in the filter bar and Eagle will filter the inspirations that have a dominant color close to it.
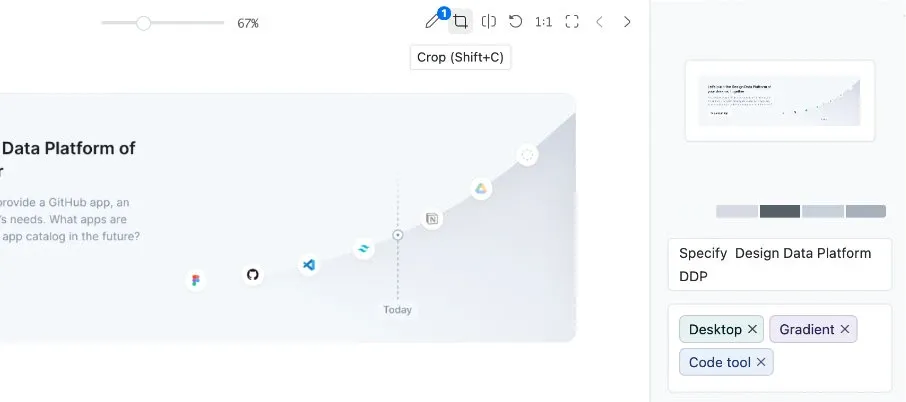
Crop an image
Eagle also has some features that you would find in an image editing software. Once the image is opened in Eagle, you have this toolbar at the top right that allows you to crop it:
Convert and reduce the weight of images
In the continuity of the previous point, Eagle even allows you to convert and compress images (not videos yet). For example, you can convert a JPG to WebP by reducing the quality or even the size to have a much lighter file. To do this, select your image then use ⇧+E (or the “Export” button in the right bar).
Auto tagging
You can set up your folders so that Eagle automatically assigns one or more tags to everything you put in them. To do this, right click on your folder to access it or use ⌘+⇧+R (Ctrl + Shift + R).
Actions
An action is a sequence of tasks that you can repeat in one click, for example, adding several tags and moving an inspiration into a folder, useful if you have to do the same thing often. To access it, it’s from the top right or with the “G” key.
Filter folders
If, like me, you have a lot of folders, a feature that one does not necessarily notice, is the fact that you can filter the display of these folders in the left bar, with the filter input at the bottom of this same bar.
Move a file from one library to another
You can easily move one or more files to another library, for that, once the file or files are selected, by right clicking, you will have the action “Add to Other Library”.
Browsing a site from Eagle
If you have saved a URL with the Eagle plugin (⌥+0, Alt + 0), you will be able to navigate on this site directly from Eagle, and it also works for videos like YouTube. Once the URL is saved on Eagle, a simple double-click on it will open it in Eagle’s browser.
Google image search
You probably know this, but Google allows you to do reverse image searches. If for example you want to see similar images from one you have in Eagle, you can do ⇧+G and Eagle will launch the query on Google (you also have other choices like Bing, for that, right click on your image then “Reverse Image Search”).
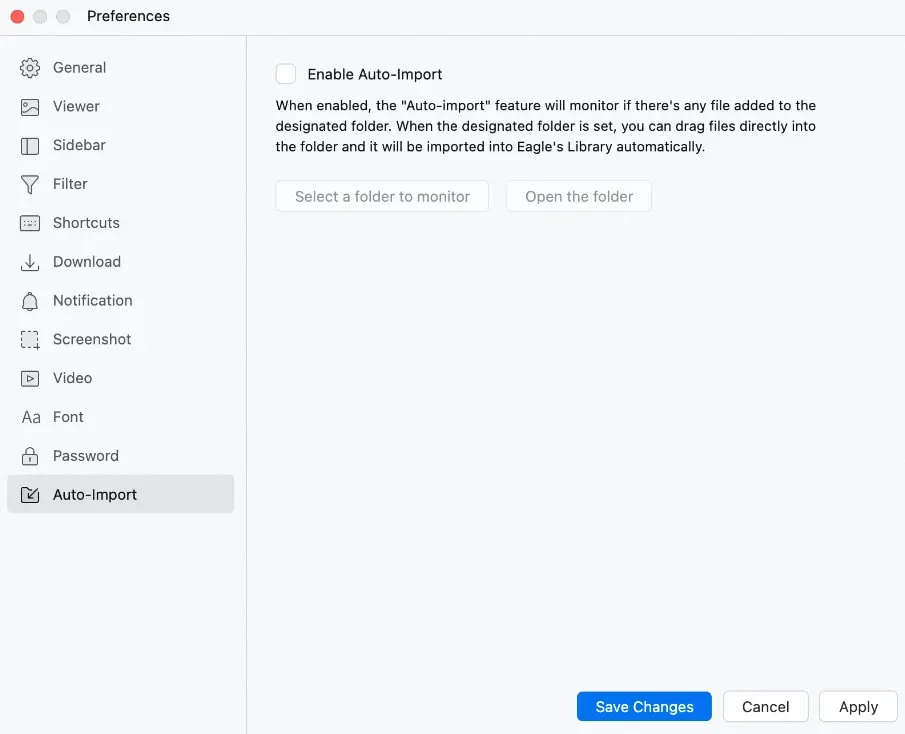
Auto-import
A powerful but a little bit hidden feature, it allows you to indicate a normal folder outside your library that Eagle will monitor and all the files you put in it will then be automatically imported in Eagle. To configure it, it’s in the settings:
Grayscale mode
A mode that can be useful if you want to look through images based on their contrast and brightness without being “disturbed” by their colors. The shortcut for this is ⌥+⌘+G (Ctrl + Alt + G).
To go further 🦅
With this article, I have presented you all the points that, according to me, are the most essential to use Eagle in an optimal way, but if you want to go further, I advise you to consult the official documentation of Eagle.
Bonus: where to find inspirations?
There are a lot of sources to find inspirations but not all are equal, among my favorites you have:
- Mobbin - Very useful to find designs of real mobile apps, for iOS and Android and categorized by several criteria.
- Behance - A classic that exists since 2005. Many real projects in all digital creative fields.
- Dribbble - More recent (2010) but as well known as Behance, tends to show more fictional concepts but more and more real projects are shown.
- Awwwards - A very well known site that rates the design of many sites on criteria such as creativity, usability and content.
- Page Flows - A goldmine where many userflows of existing products are presented in video, it’s a paid service but some are free.
- Muzli Magazine- A quality blog mixing UX/UI Design articles and selected design collections.
To learn more, I wrote a free book where I list all my favorite UX/UI Design resources, from the best tools to the best sources of assets and more, like where to find a job in this field.
The article is originally written by Doko Zero- How to manage your UI Design inspirations with Eagle, you can follow his Twitter, Instagram, Website
Related Posts