Folders
Folders, the most basic yet indispensable regular management tools. The regular folders would become quite troublesome when there are numerous folders and when the subfolders are complex. However, Eagle has added new features to the folders to bring better user experience. Let's introduce you to the features of the Eagle folder.
Create Folders
First, let's create folders. There are three ways to create folders:
- The "+" button next to the "Folder" navigation tab

- The "+" button next to the Library name

- ⌘ + Shift + N
After the folder is created, it's time to give it a proper name, you can name the folders in the types of the contents or colors, the better organized the folders' name are, the faster you can search them when they are needed afterward!
Add Images to the Folder
After the folder is created, you can add images to the folder. The images can be added to the folder in the following ways:
- Drag and drop images to the folder
- Copy images and paste
- Shift + D
in the case you need to add a large number of images to the same folder, the shortcut key can be used to quickly categorize images to the folders where you categorized images to last time. - Right-click on the image and select add to folders
Open the select folder menu, select the folder you wish the images to be added to. For more information, please see here.
Rename the Folder
A properly named folder can greatly help in finding and organizing the folders or images when they are needed afterward. If you wish to rename, here's how:
- Double click on the folder's name
- Right-click the folder, select "Rename"
- ⌘ + R

Customize the folder's Icon and Color
Eagle provides the feature to customize folders' icons and colors. With different icons and colors, you can find the wanted folders easier and have a better user experience.
- Right-click the folder and select the icon and color you like.

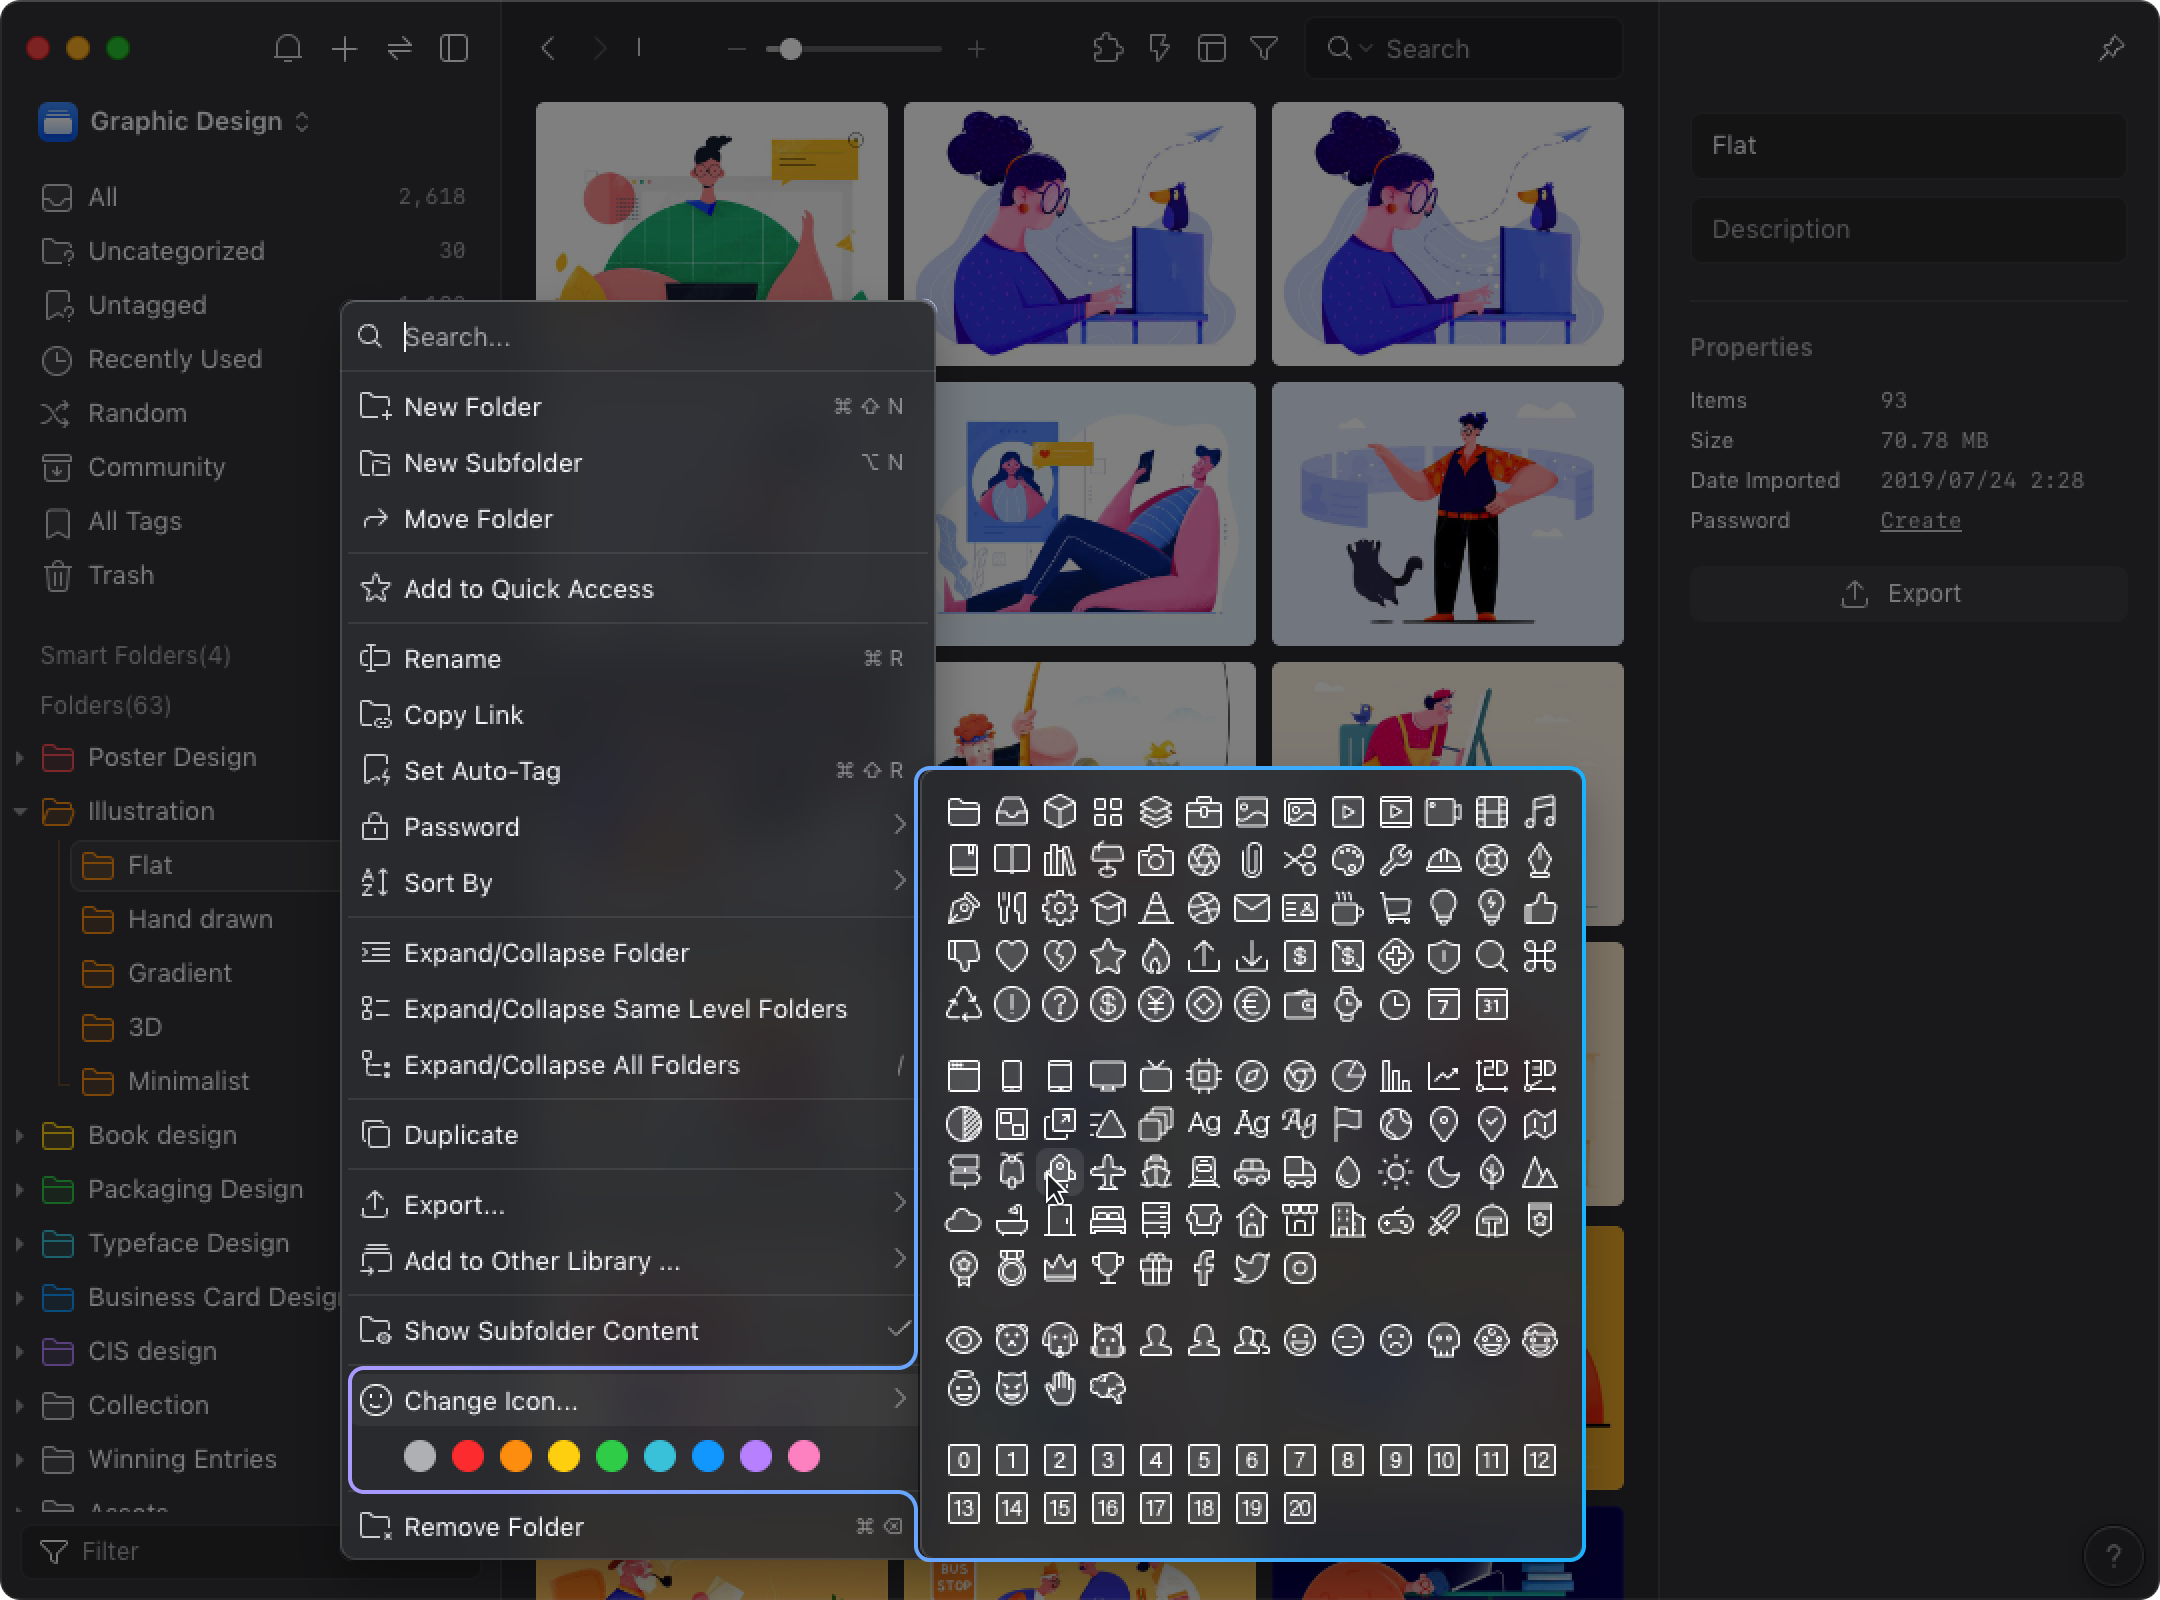
- The customization is completed, the folders icons and colors are changed.
Hierarchical Folder
Eagle supports hierarchical folder, click the left arrow of the parent folder to expand subfolders. The hierarchical folder helps you to more easily organize folders and reduce the time it takes to search for folders. 
Right-click on the Hierarchical Button
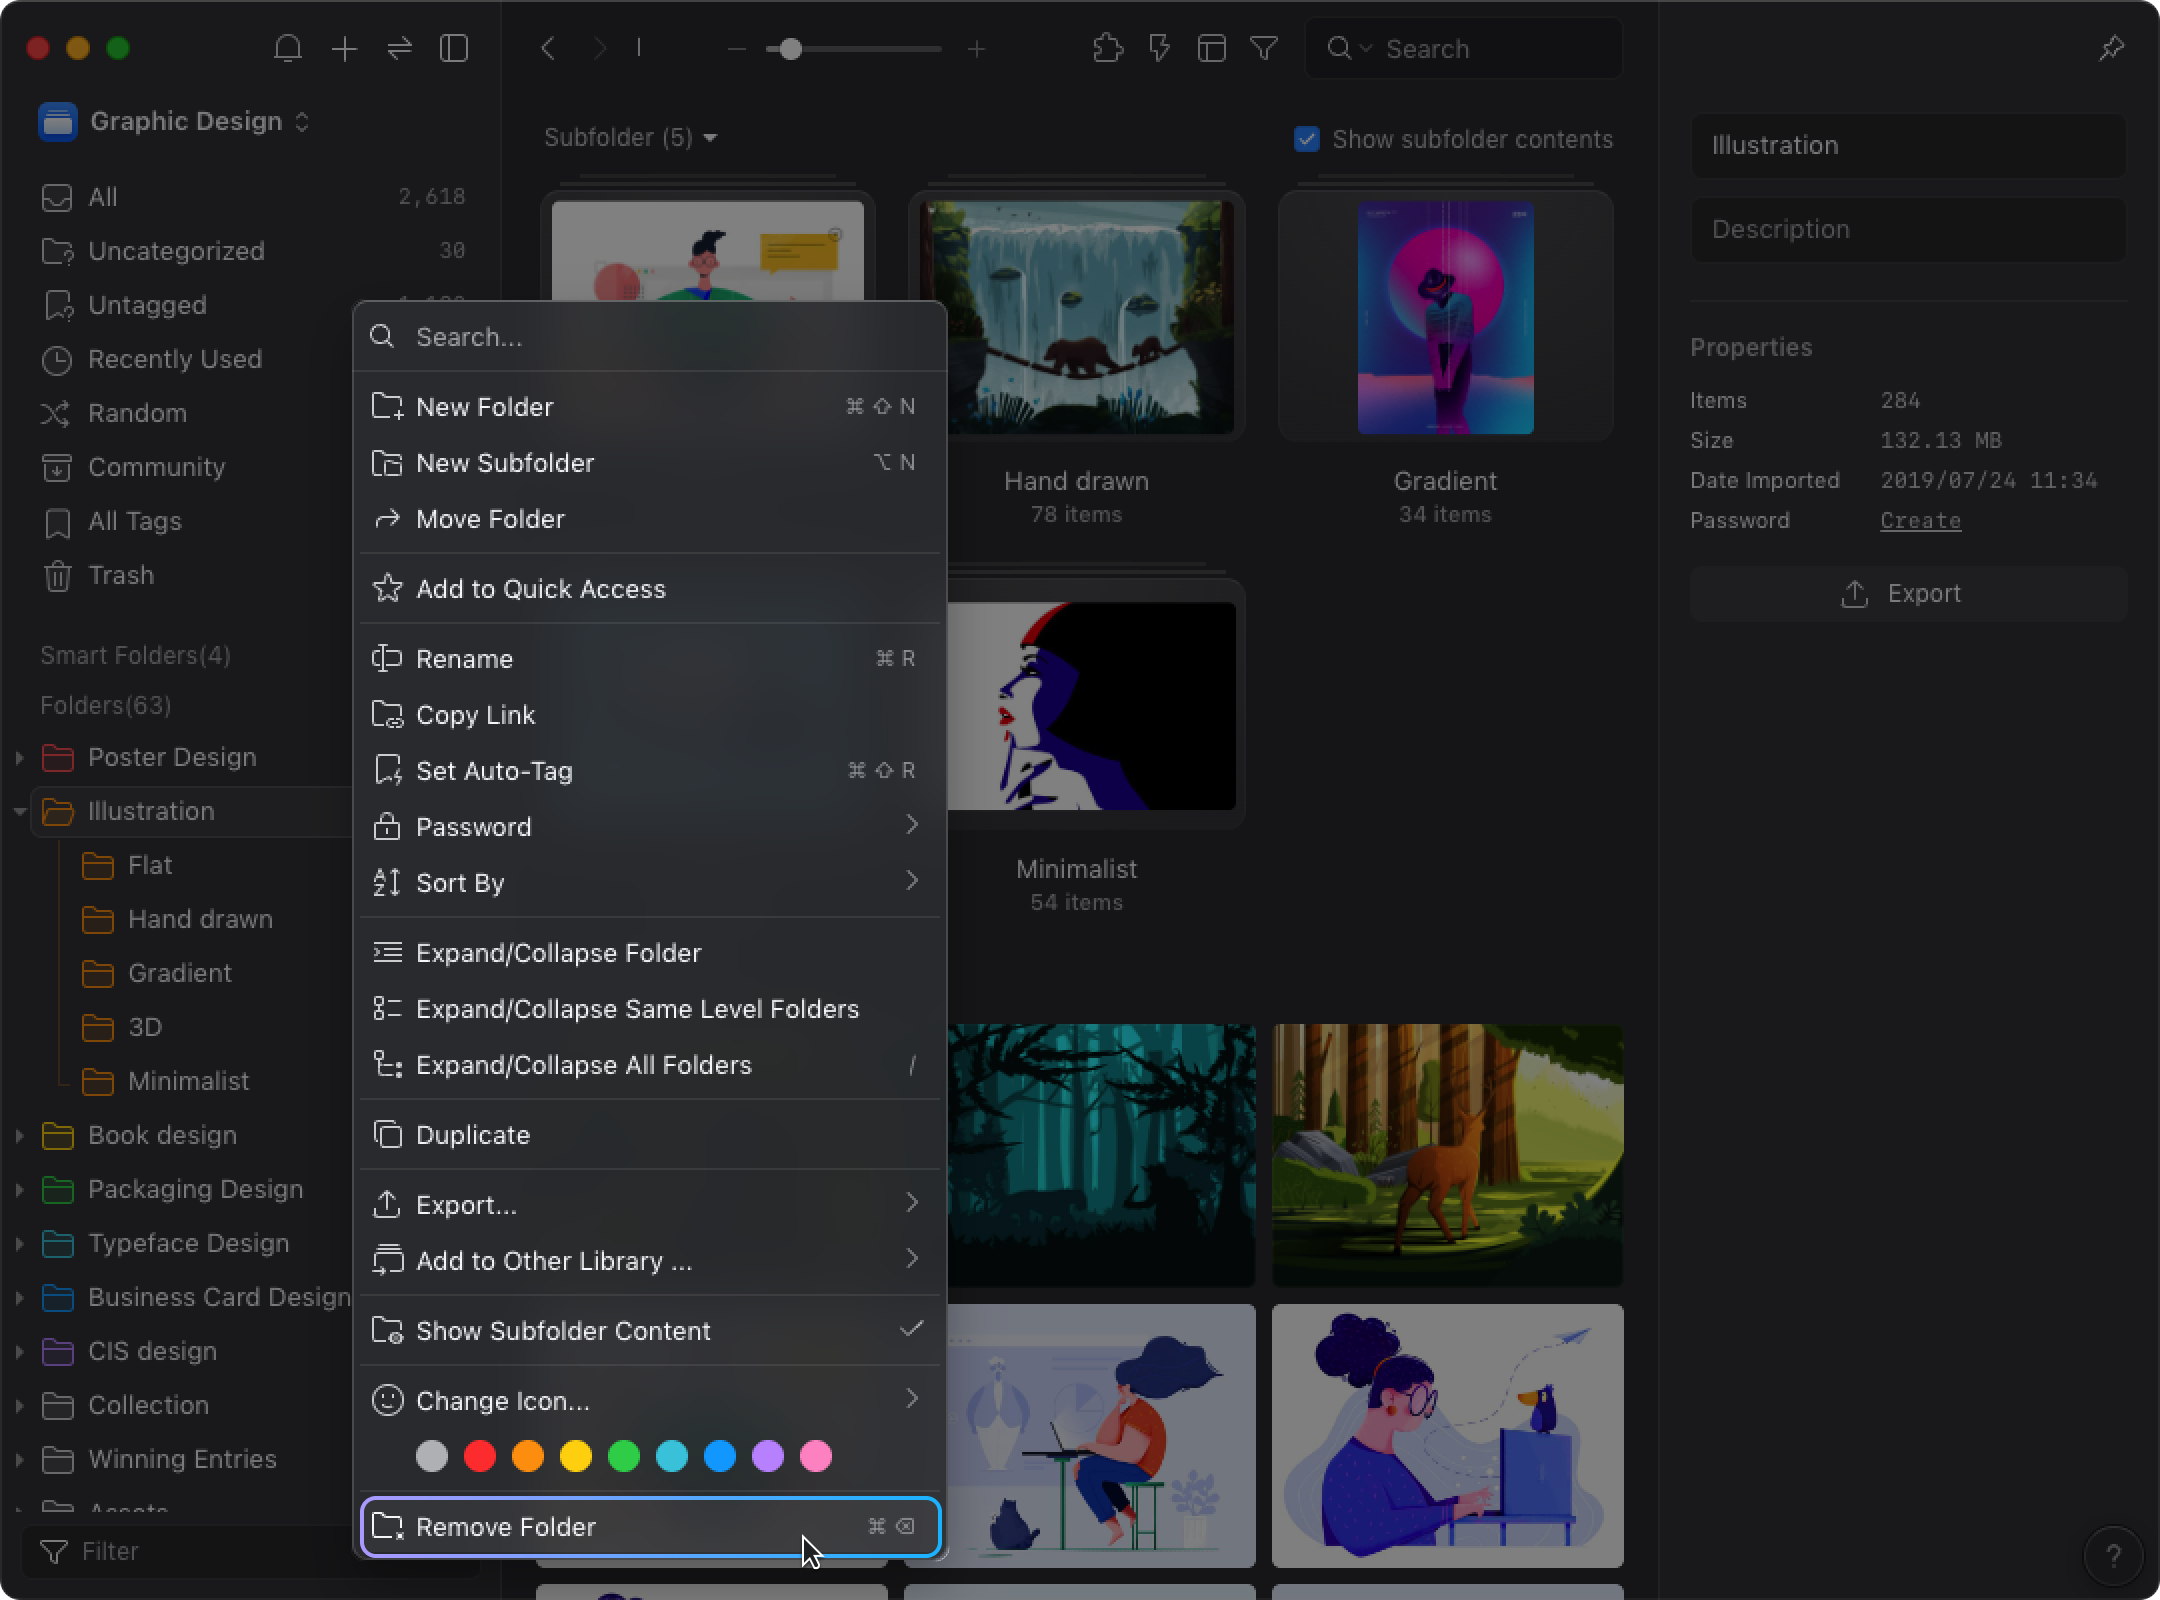
You can right-click the hierarchical button to open the context menu. For details of the menu, please refer to the introduction below:
- Expand/Collapse Folder
Select "Expand/Collapse Folder" to expand/collapse this folder. - Expand/Collapse Same Level Folder
Select "Expand/Collapse Same Level Folders" to expand/collapse all the same level folders. - Expand/Collapse All Folders
Select "Expand/Collapse All Folders" to expand/collapse all folders.
Create Subfolders
- Right-click on the folder and select “New Subfolder”
- Create a folder and drag it to the parent folder which you wish the subfolder to be under.

Sort Folders
A neat folder order not only reduces the fatigue of browsing but also increases the efficiency of searching. You can create a unique and efficient order by sorting folders and customizing folder icons and colors.
- Drag folders to where you want it to be located
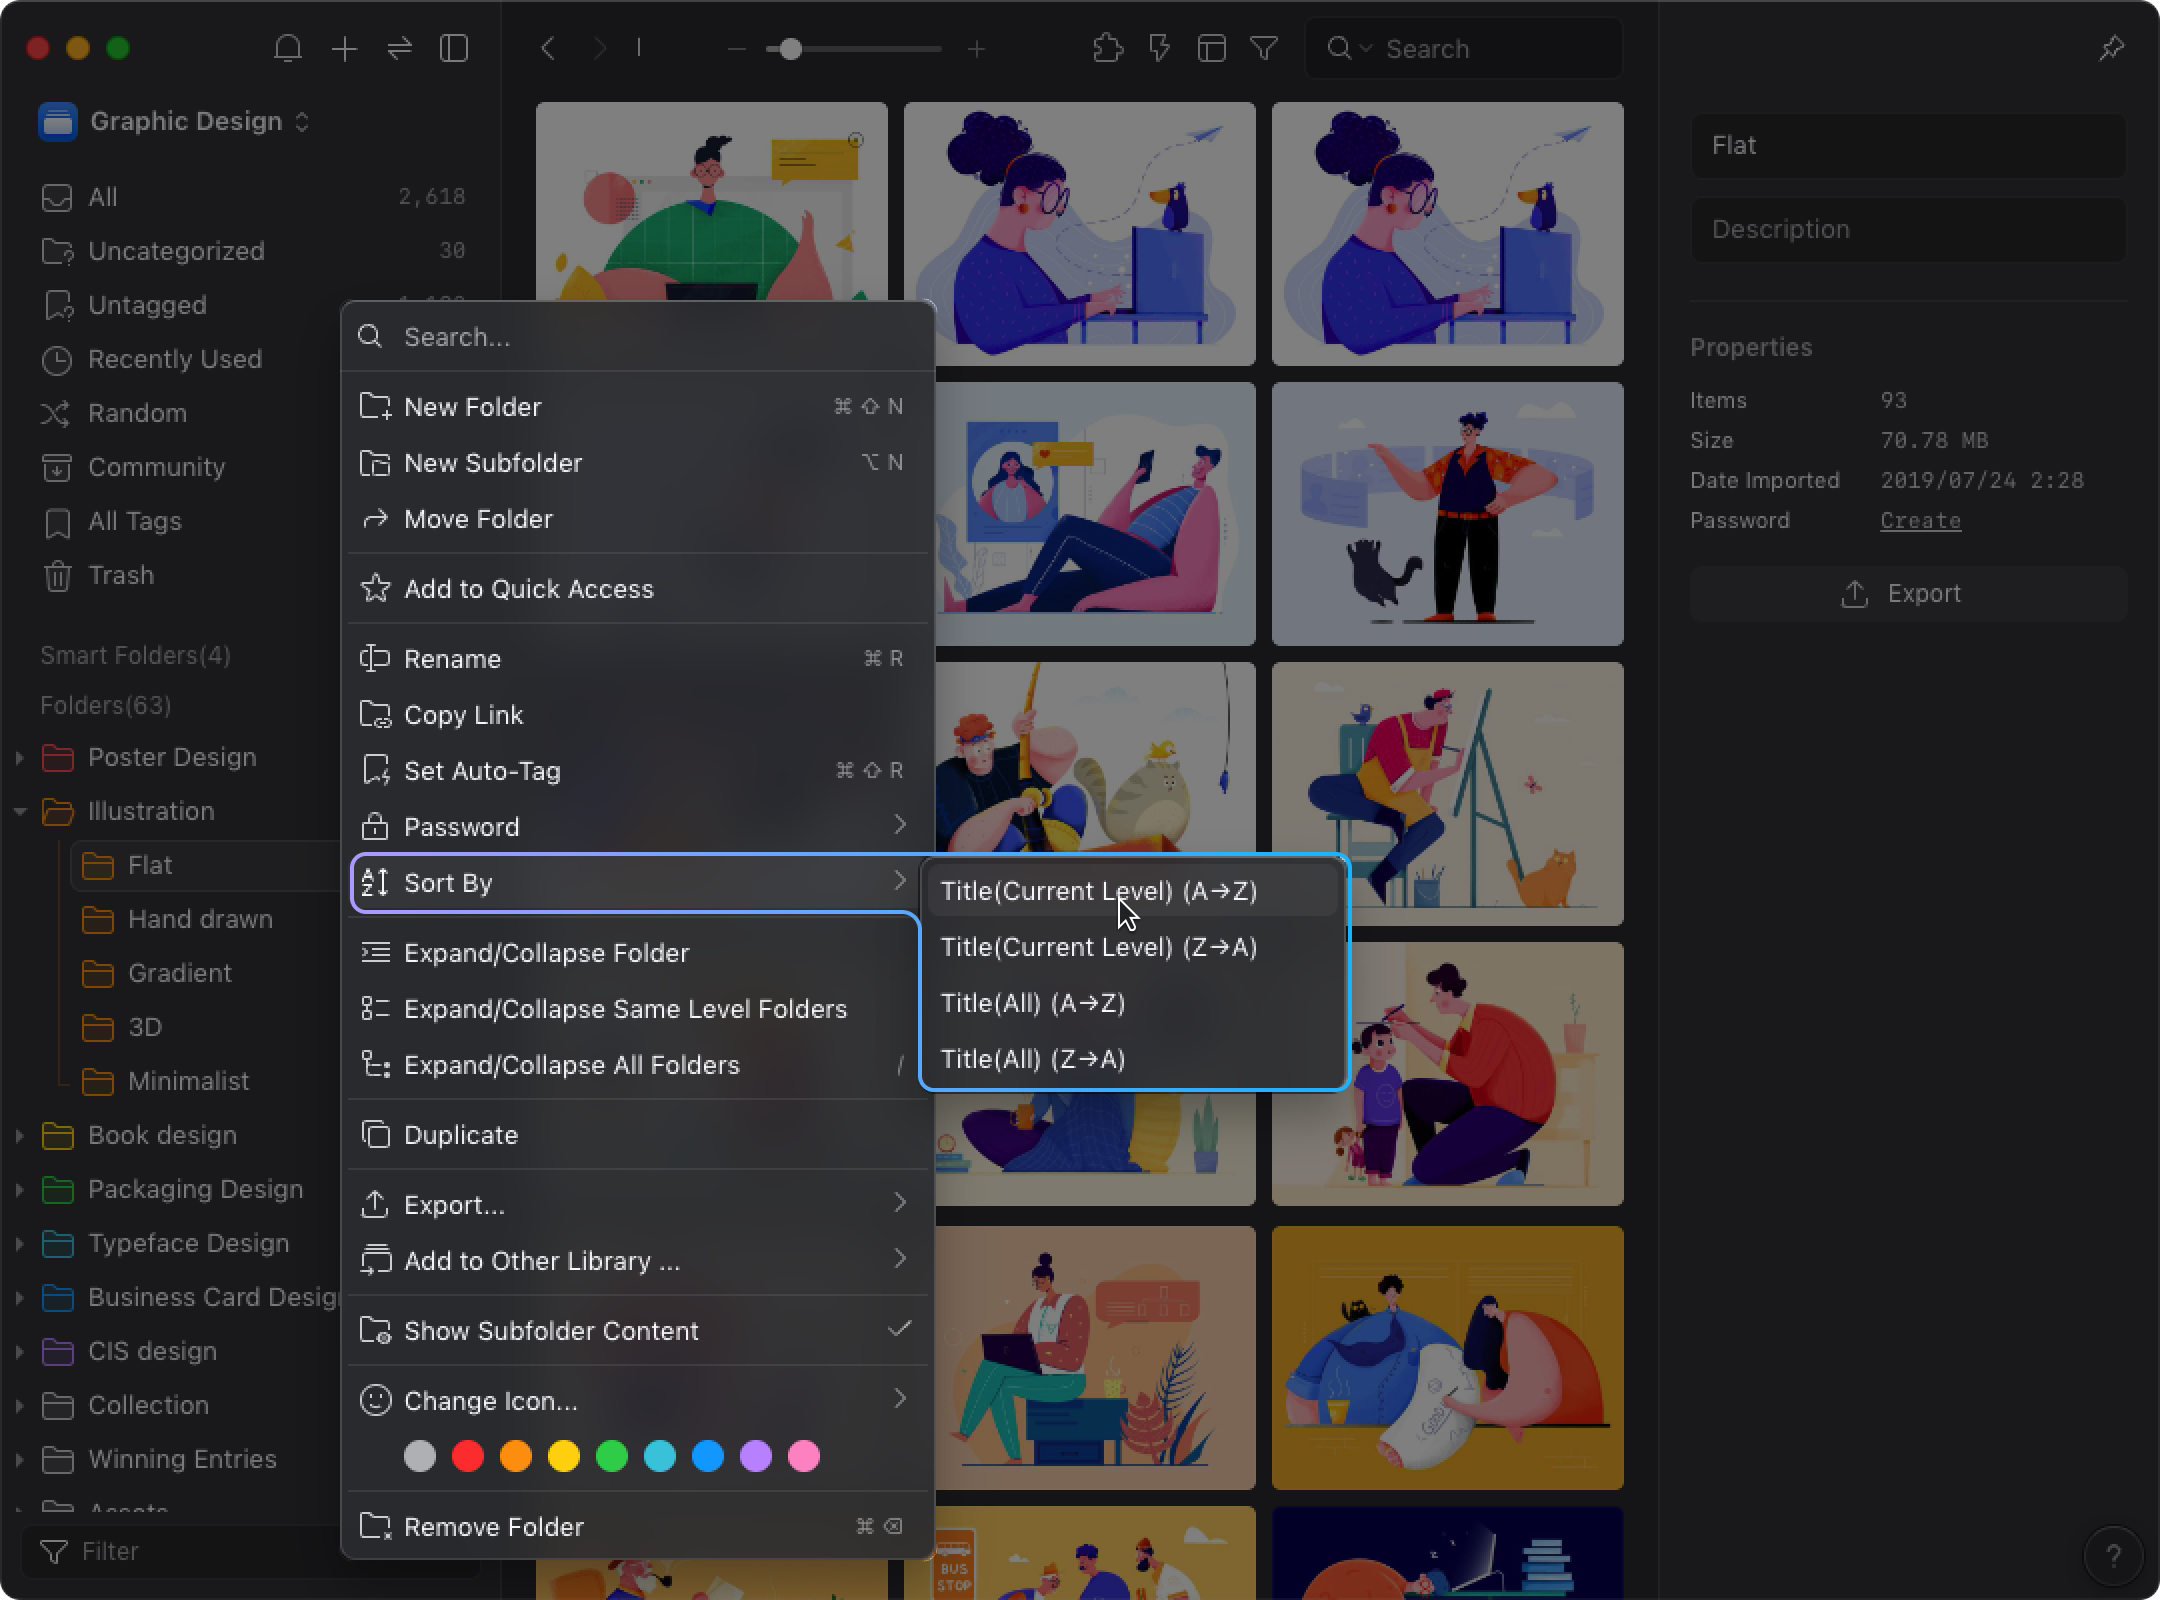
- Sort folders by title
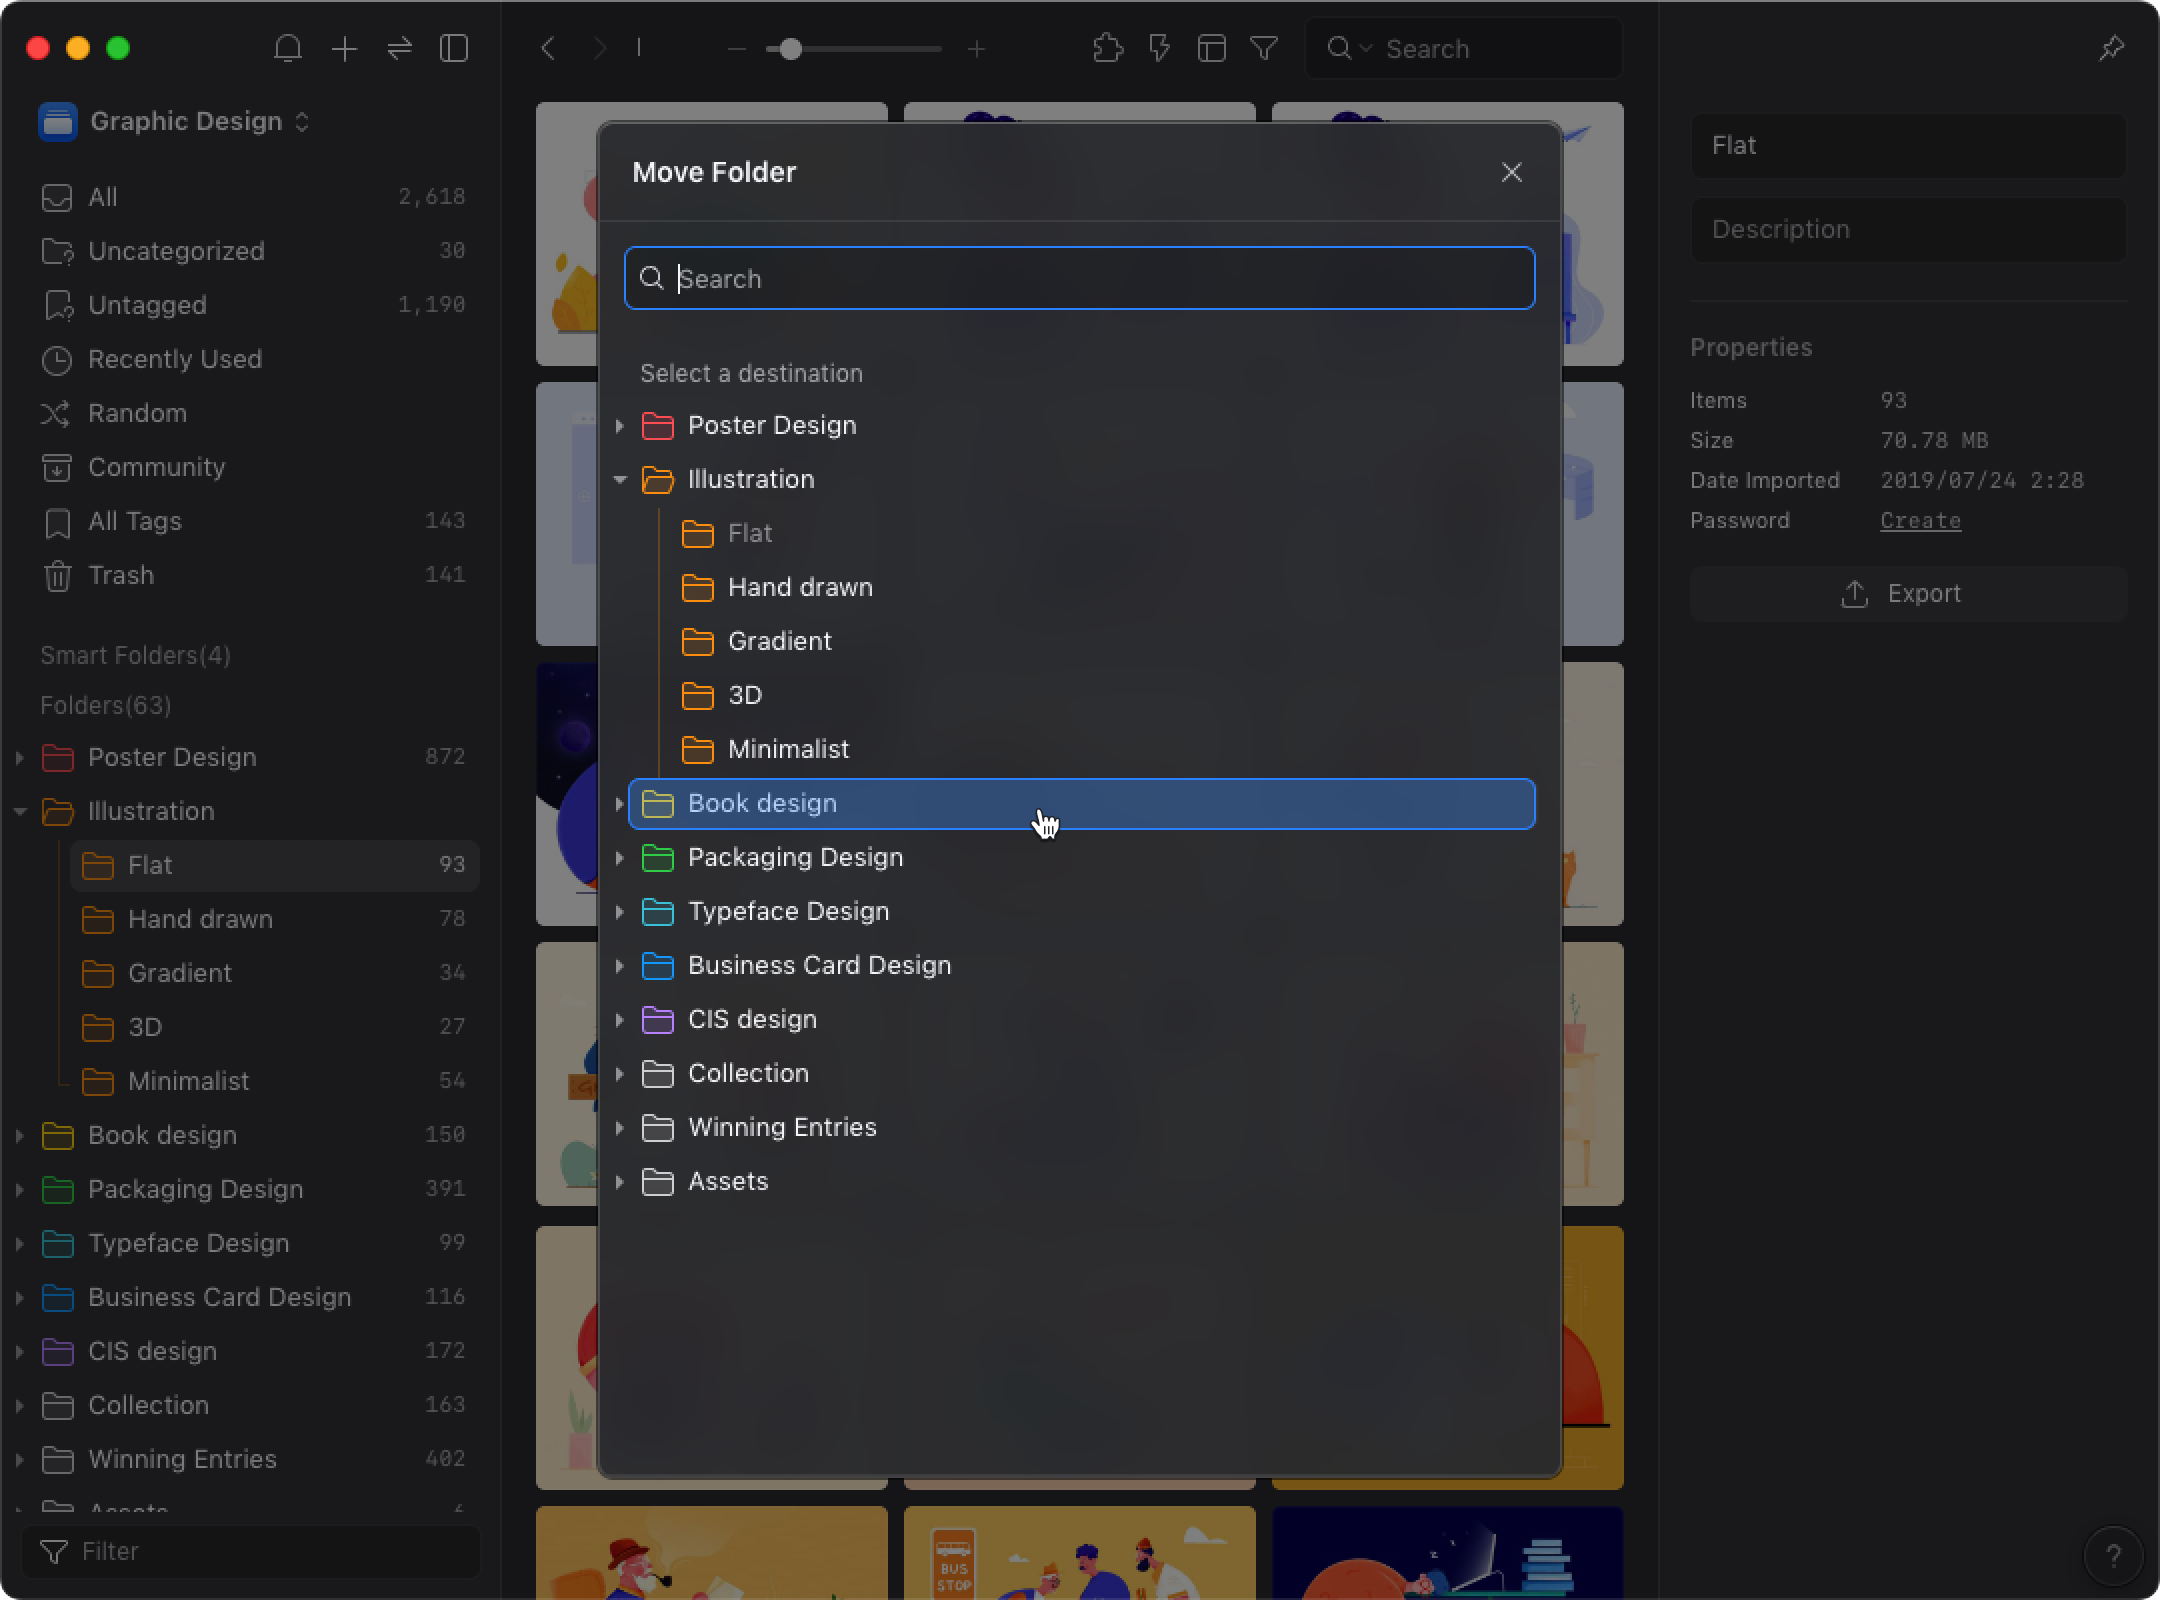
- Move folder
If you have lots of folders that you wish to move, you can use the “Move folder” function. Directly click the location where you want the folder(s) to be moved to, then the sorting is completed, simple and easy.
Show Subfolder Content
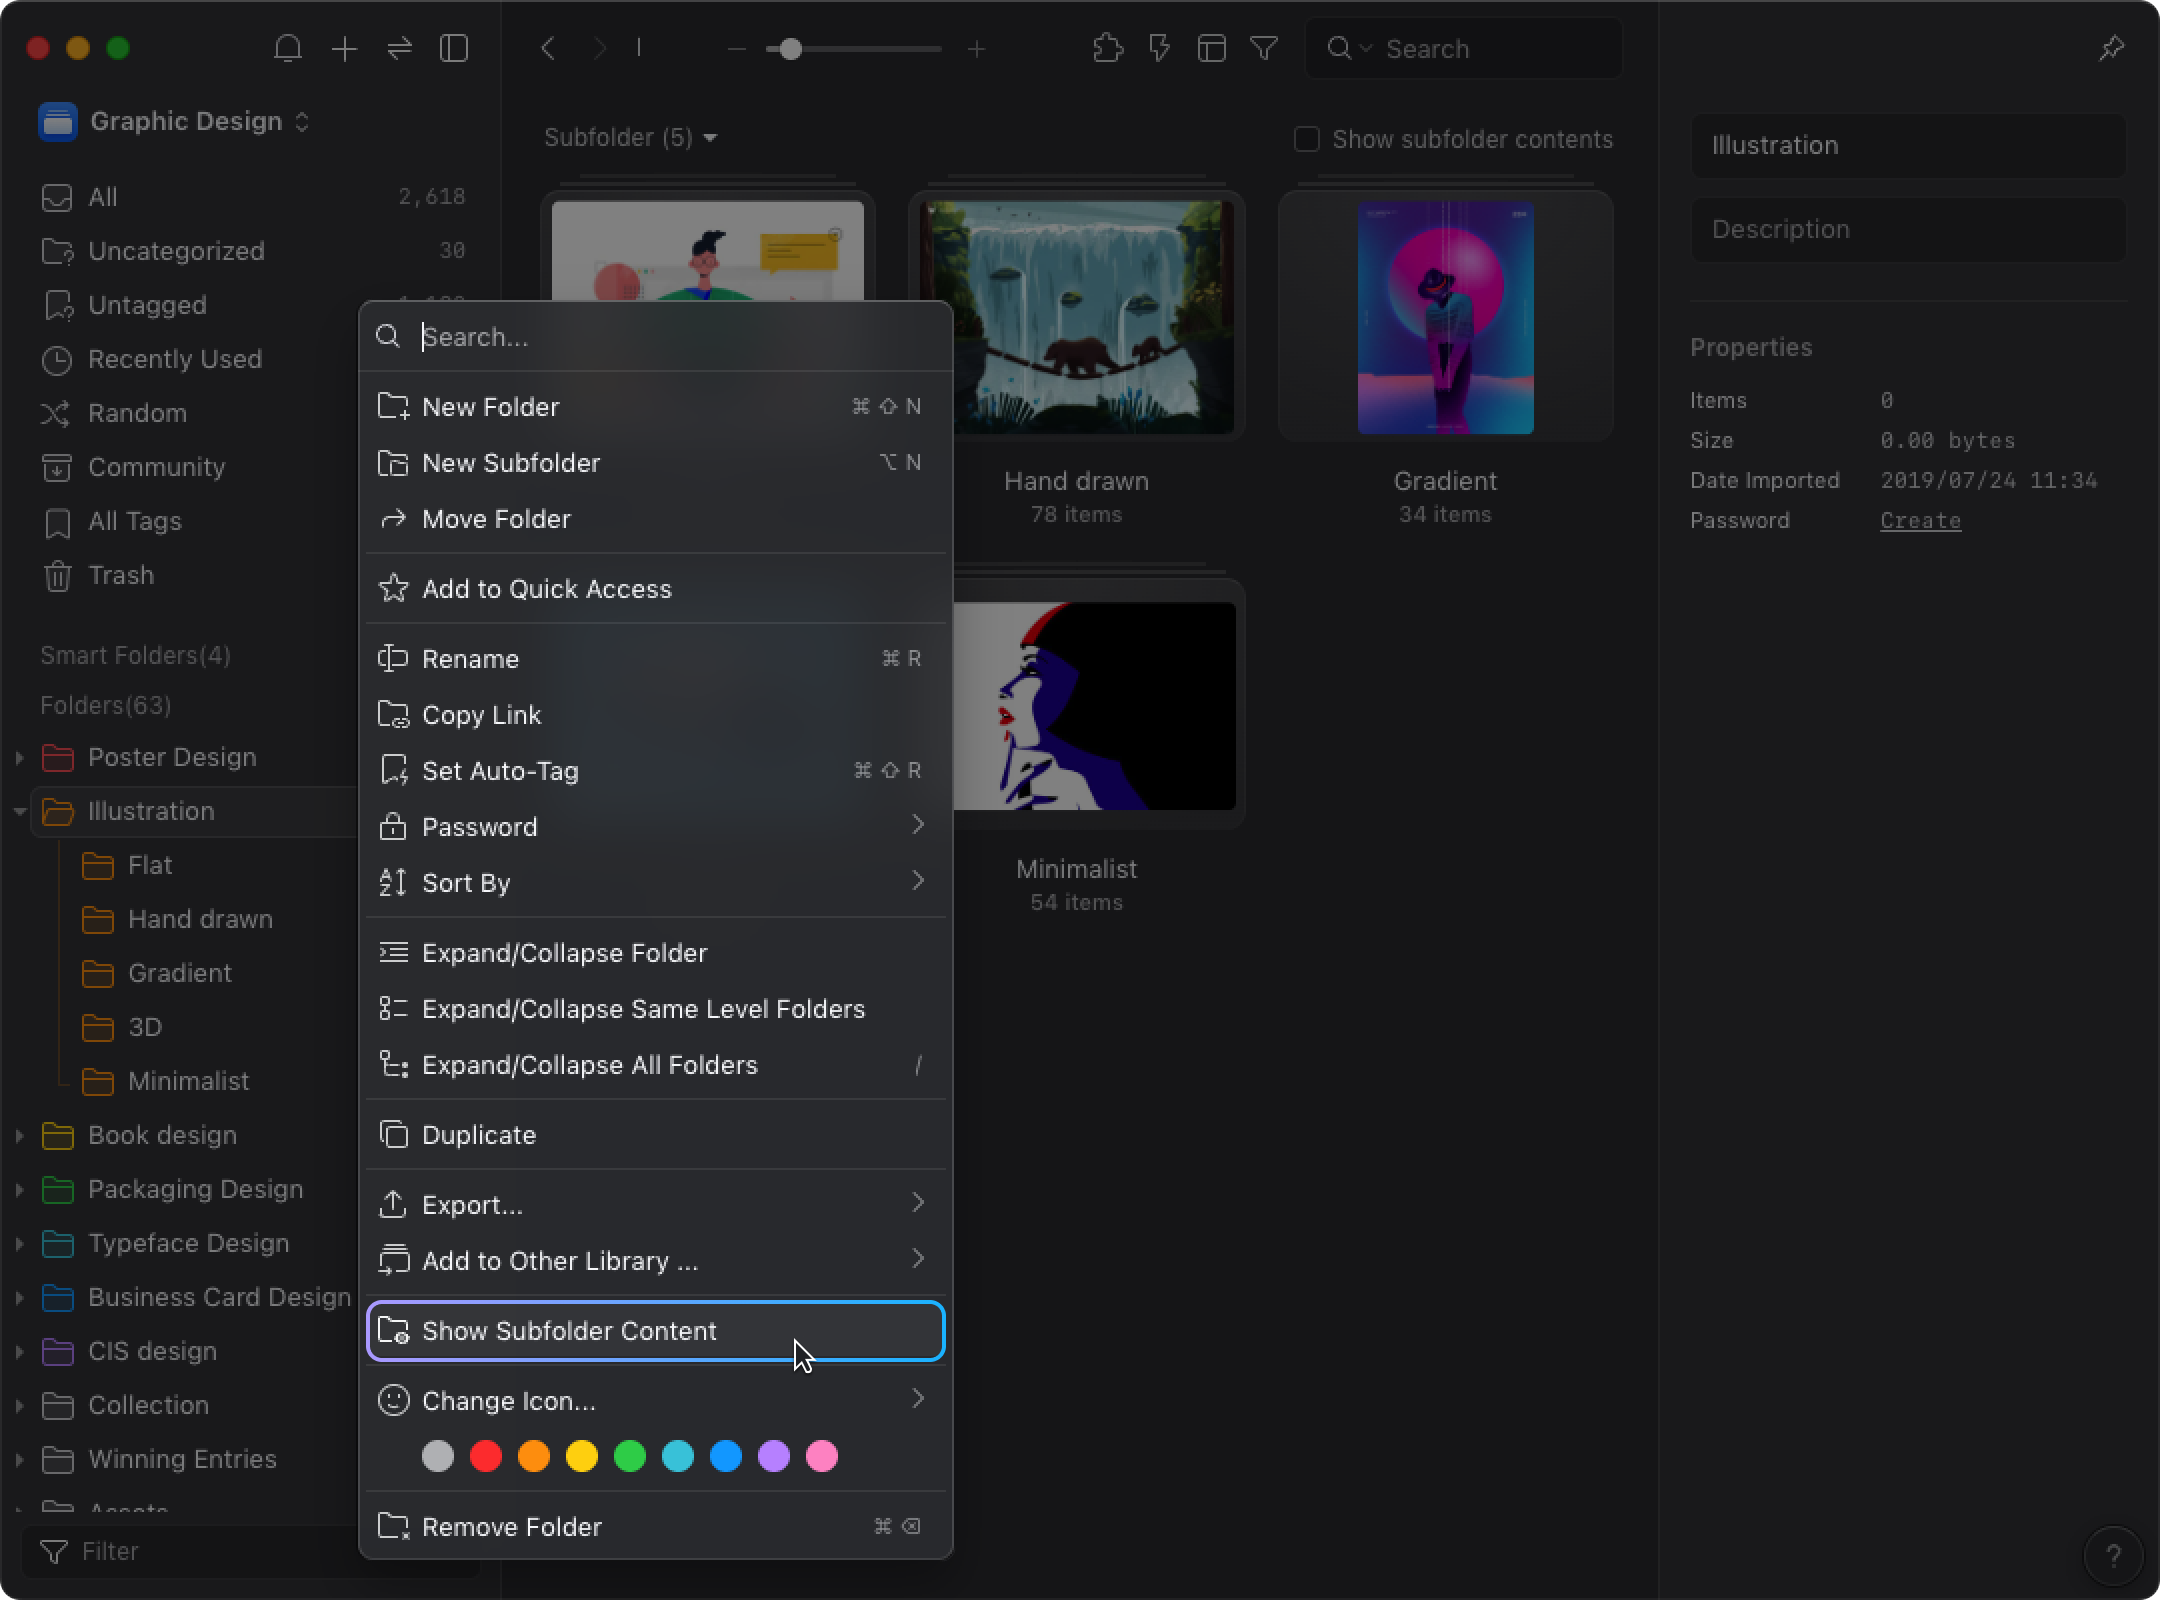
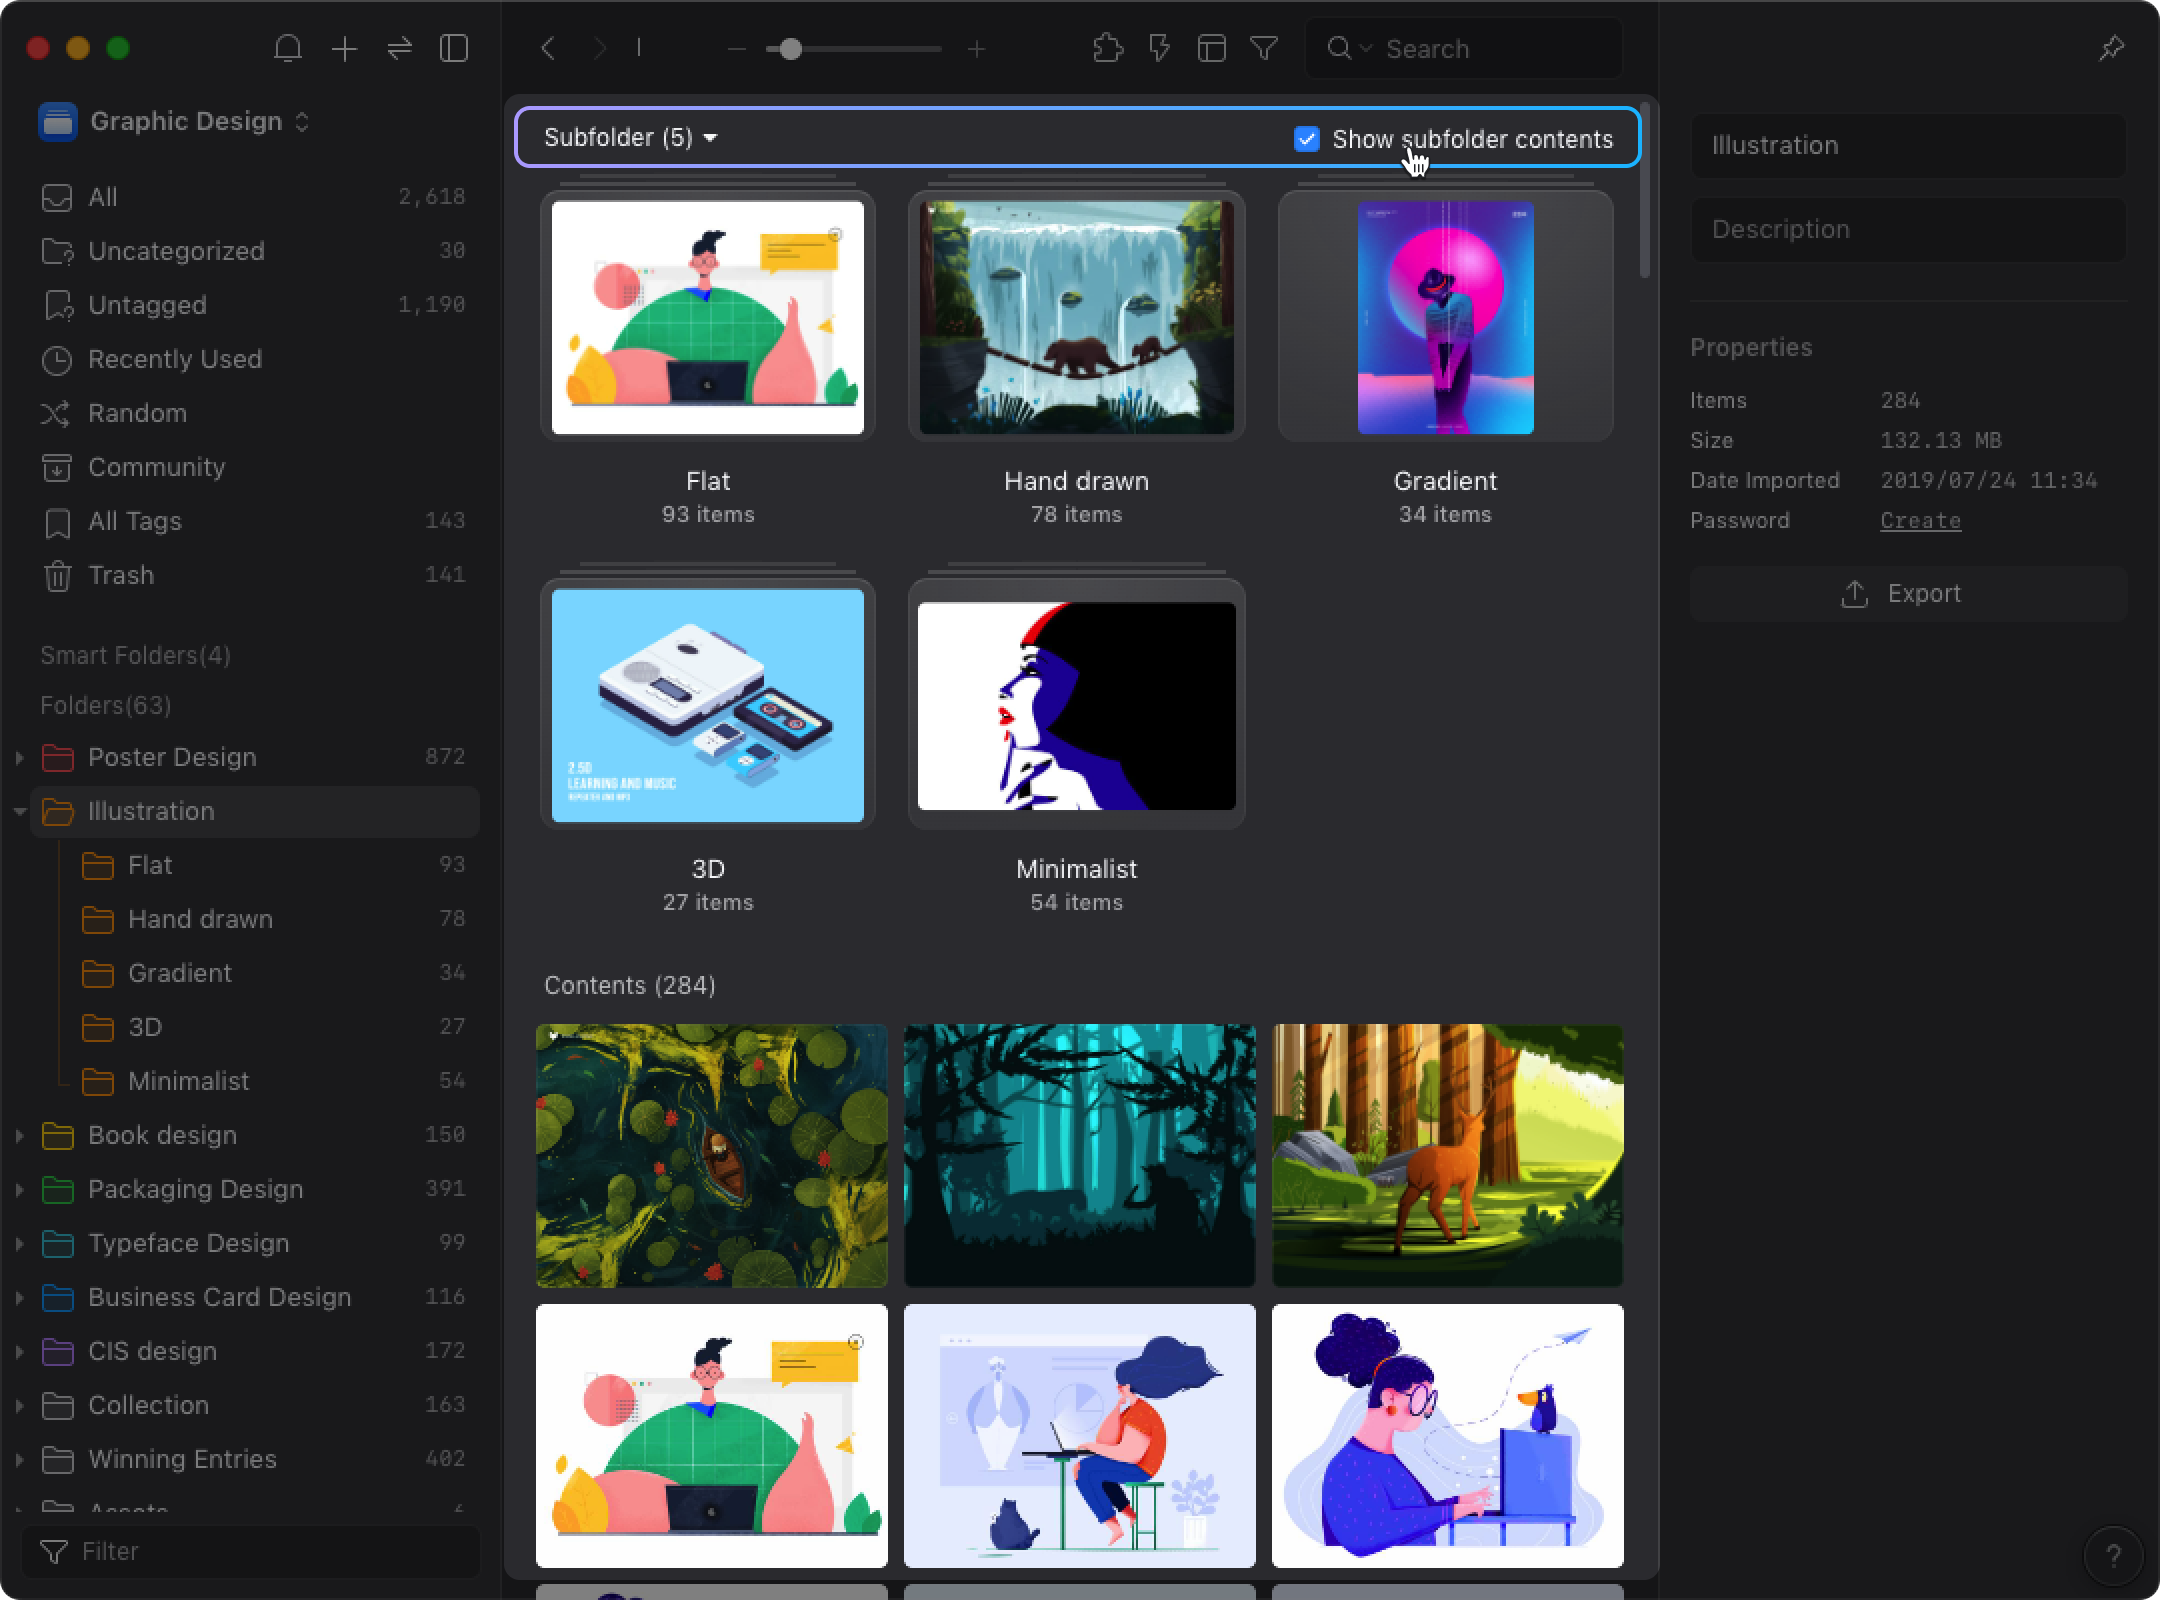
By default, contents within subfolders won't be displayed under the parent folder, but if you want to display the subfolder content in the parent folder, please follow the steps below:
- Right-click on the parent folder, select "Show Subfolder Content".
- The subfolder content is displayed in the parent folder.
Remove Folders
- Right-click on the folder and select delete
- Shortcut key ⌘ + Delete
